
Dropwizard is a popular java framework for restful service. It provides out of the box support for configuration, application metrics, logging and operational tools so the developers focus more on writing business logic and not on set ups.
Agenda
This tutorial should help you set up your dropwizard project and few APIs.
Let’s start!
Create Maven Project
Use your favourite IDE (Intellj or eclipse) and create a maven project. I will paste the screenshot for Intellij.
Click on Create New Project

Select Maven in the left-hand side pan.
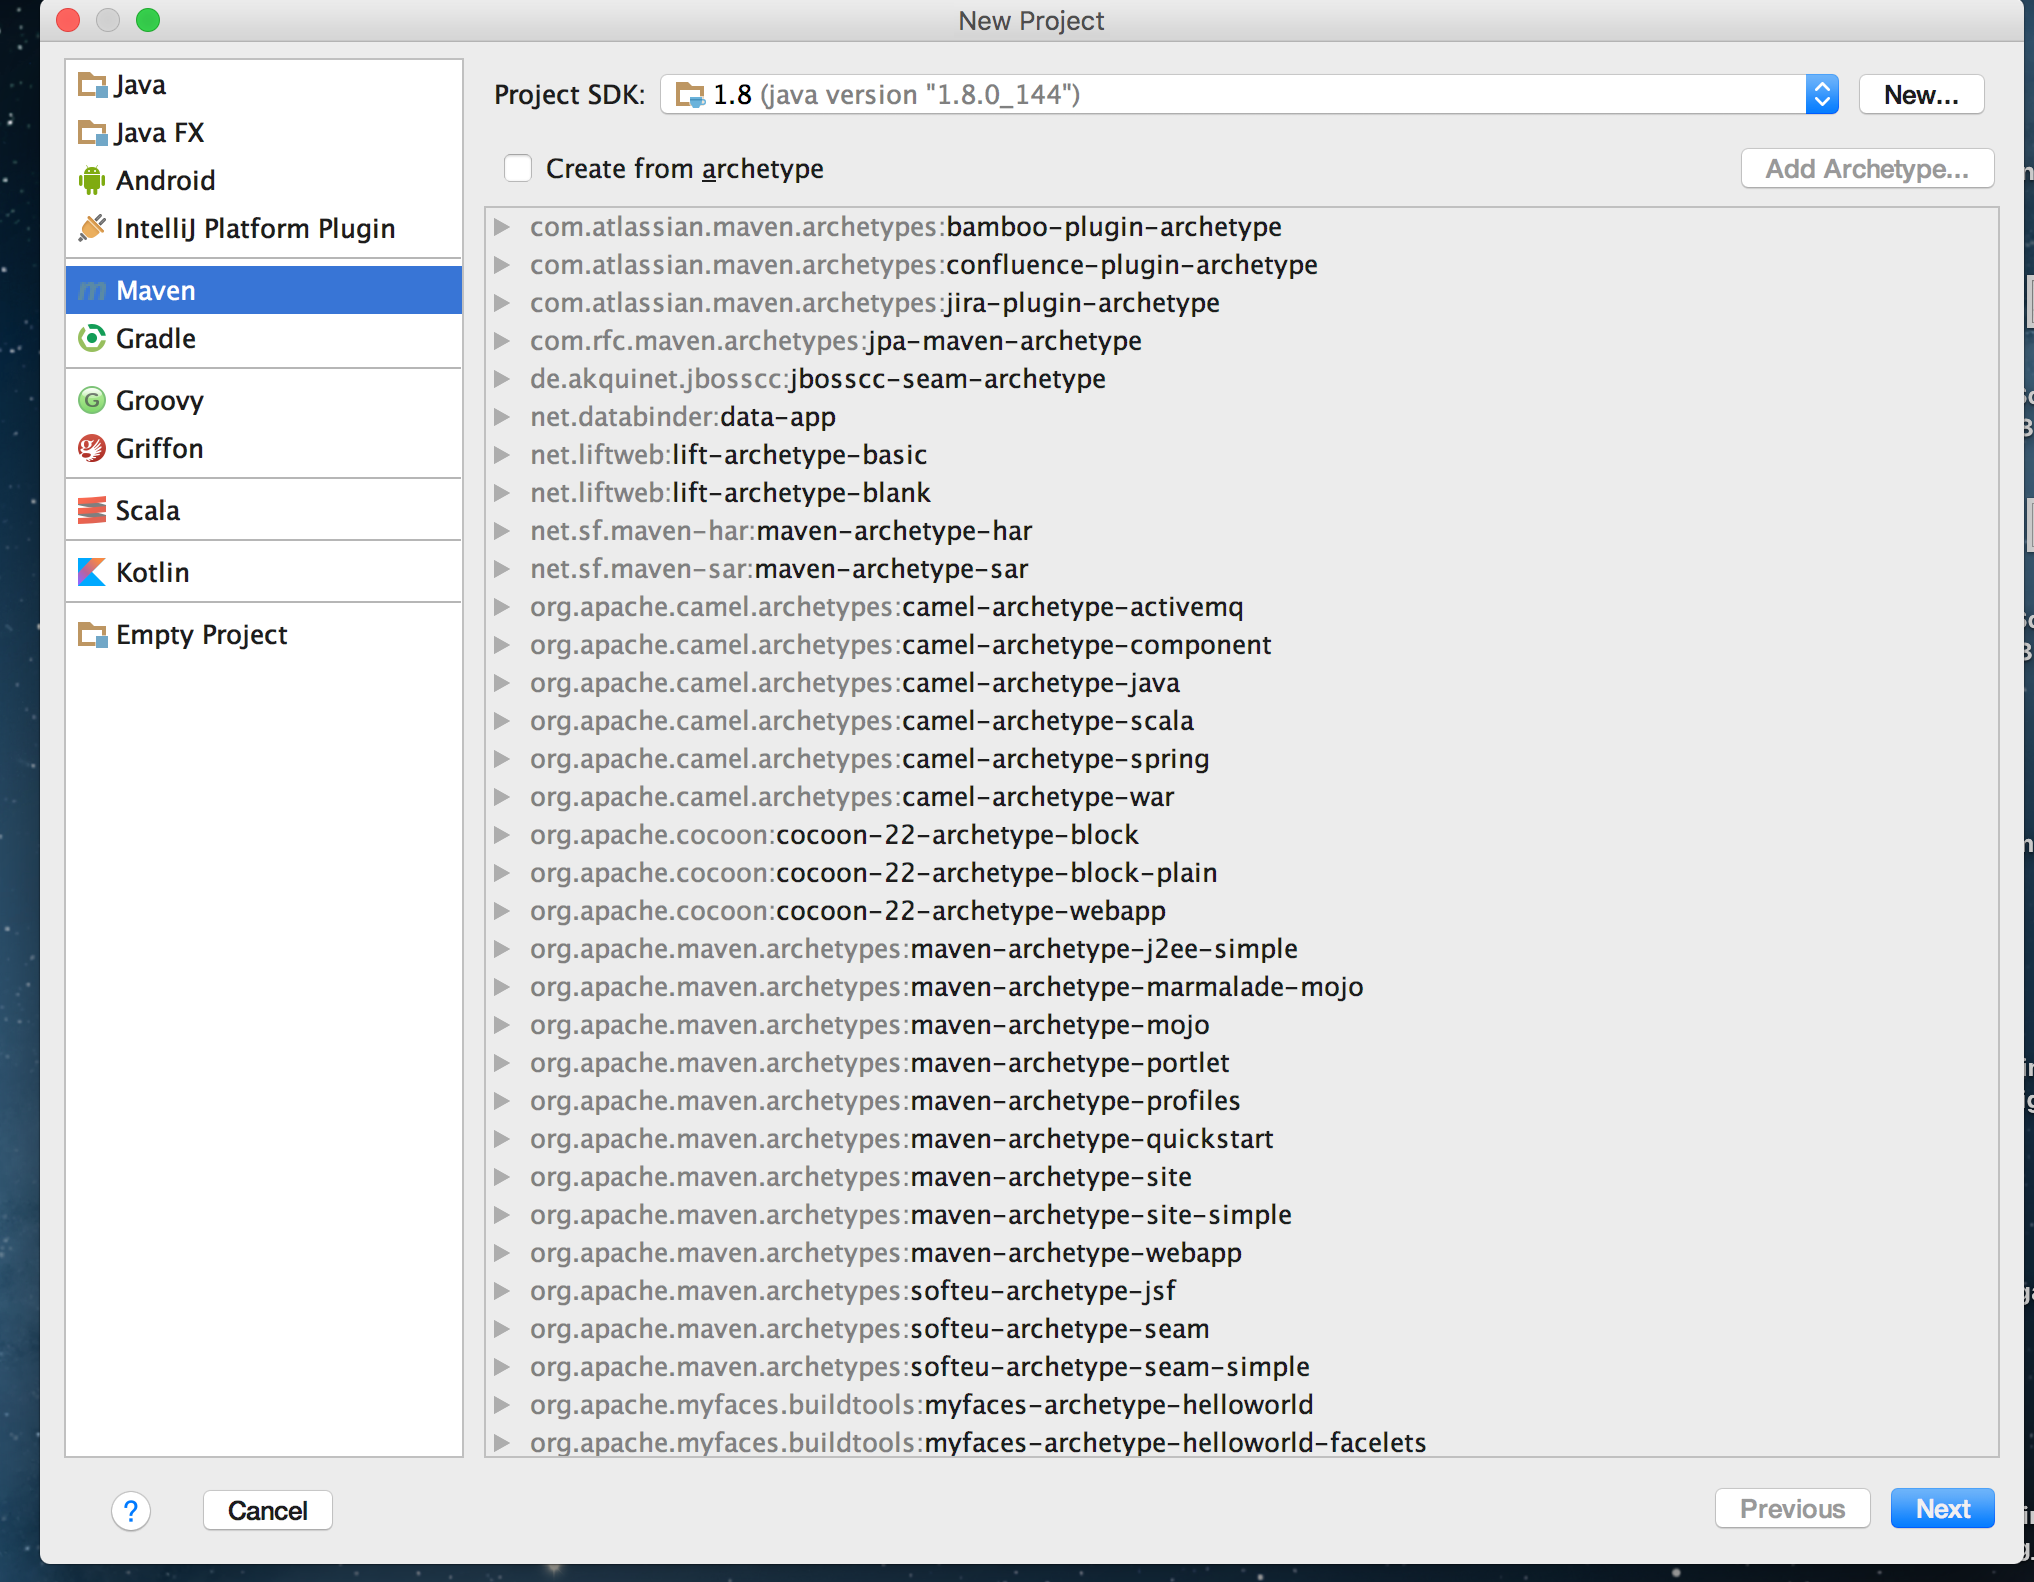
Enter artifactid and groupid.
Read here to know about group id and artifact id.

Enter the project name.

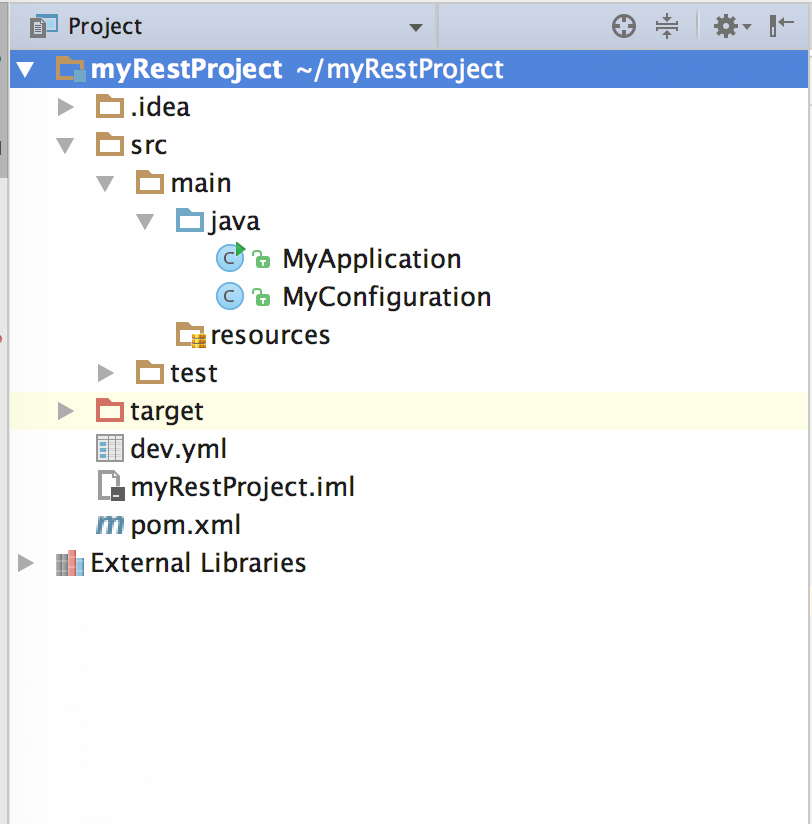
Click Finish and you should see the project in your IDE. Add a file called dev.yml in your project. Your project structure should look like this.

Add Dropwizard Dependency in your pom.xml
| <?xml version="1.0" encoding="UTF-8"?> | |
| <project xmlns="http://maven.apache.org/POM/4.0.0" | |
| xmlns:xsi="http://www.w3.org/2001/XMLSchema-instance" | |
| xsi:schemaLocation="http://maven.apache.org/POM/4.0.0 http://maven.apache.org/xsd/maven-4.0.0.xsd"> | |
| <modelVersion>4.0.0</modelVersion> | |
| <groupId>com.wordpress.nullpointerexception1</groupId> | |
| <artifactId>myRestProject</artifactId> | |
| <version>1.0-SNAPSHOT</version> | |
| <properties> | |
| <dropwizard.version>1.3.5</dropwizard.version> | |
| </properties> | |
| <dependencies> | |
| <dependency> | |
| <groupId>io.dropwizard</groupId> | |
| <artifactId>dropwizard-core</artifactId> | |
| <version>${dropwizard.version}</version> | |
| </dependency> | |
| </dependencies> | |
| </project> |
Add Configuration file
Under src/main/java, as shown in the figure; create a java file called myConfiguration.java which extends Configuration.java. This file is wired to your dev.yml. This helps in changing the configuration without changing the code.
| import io.dropwizard.Configuration; | |
| /** | |
| * Created by harshvardhan on 12/07/18. | |
| */ | |
| public class MyConfiguration extends Configuration { | |
| private String url; | |
| public String getUrl() { | |
| return url; | |
| } | |
| public void setUrl(String url) { | |
| this.url = url; | |
| } | |
| } |
Your dev.yml should look like this:
| url: https://nullpointerexception1.wordpress.com/ |
Essentially, this means MyConfiguration.getUrl() will give me the url defined in dev.yml.
Add Main Method called MyApplication
| import io.dropwizard.Application; | |
| import io.dropwizard.setup.Environment; | |
| /** | |
| * Created by harshvardhan on 12/07/18. | |
| */ | |
| public class MyApplication extends Application<MyConfiguration> { | |
| public static void main(String[] args) throws Exception { | |
| new MyApplication().run(args); | |
| } | |
| public void run(MyConfiguration myConfiguration, Environment environment) throws Exception { | |
| System.out.println("Value from dev.yml is "+myConfiguration.getUrl()); | |
| } | |
| } |
Your project structure should look like this now:
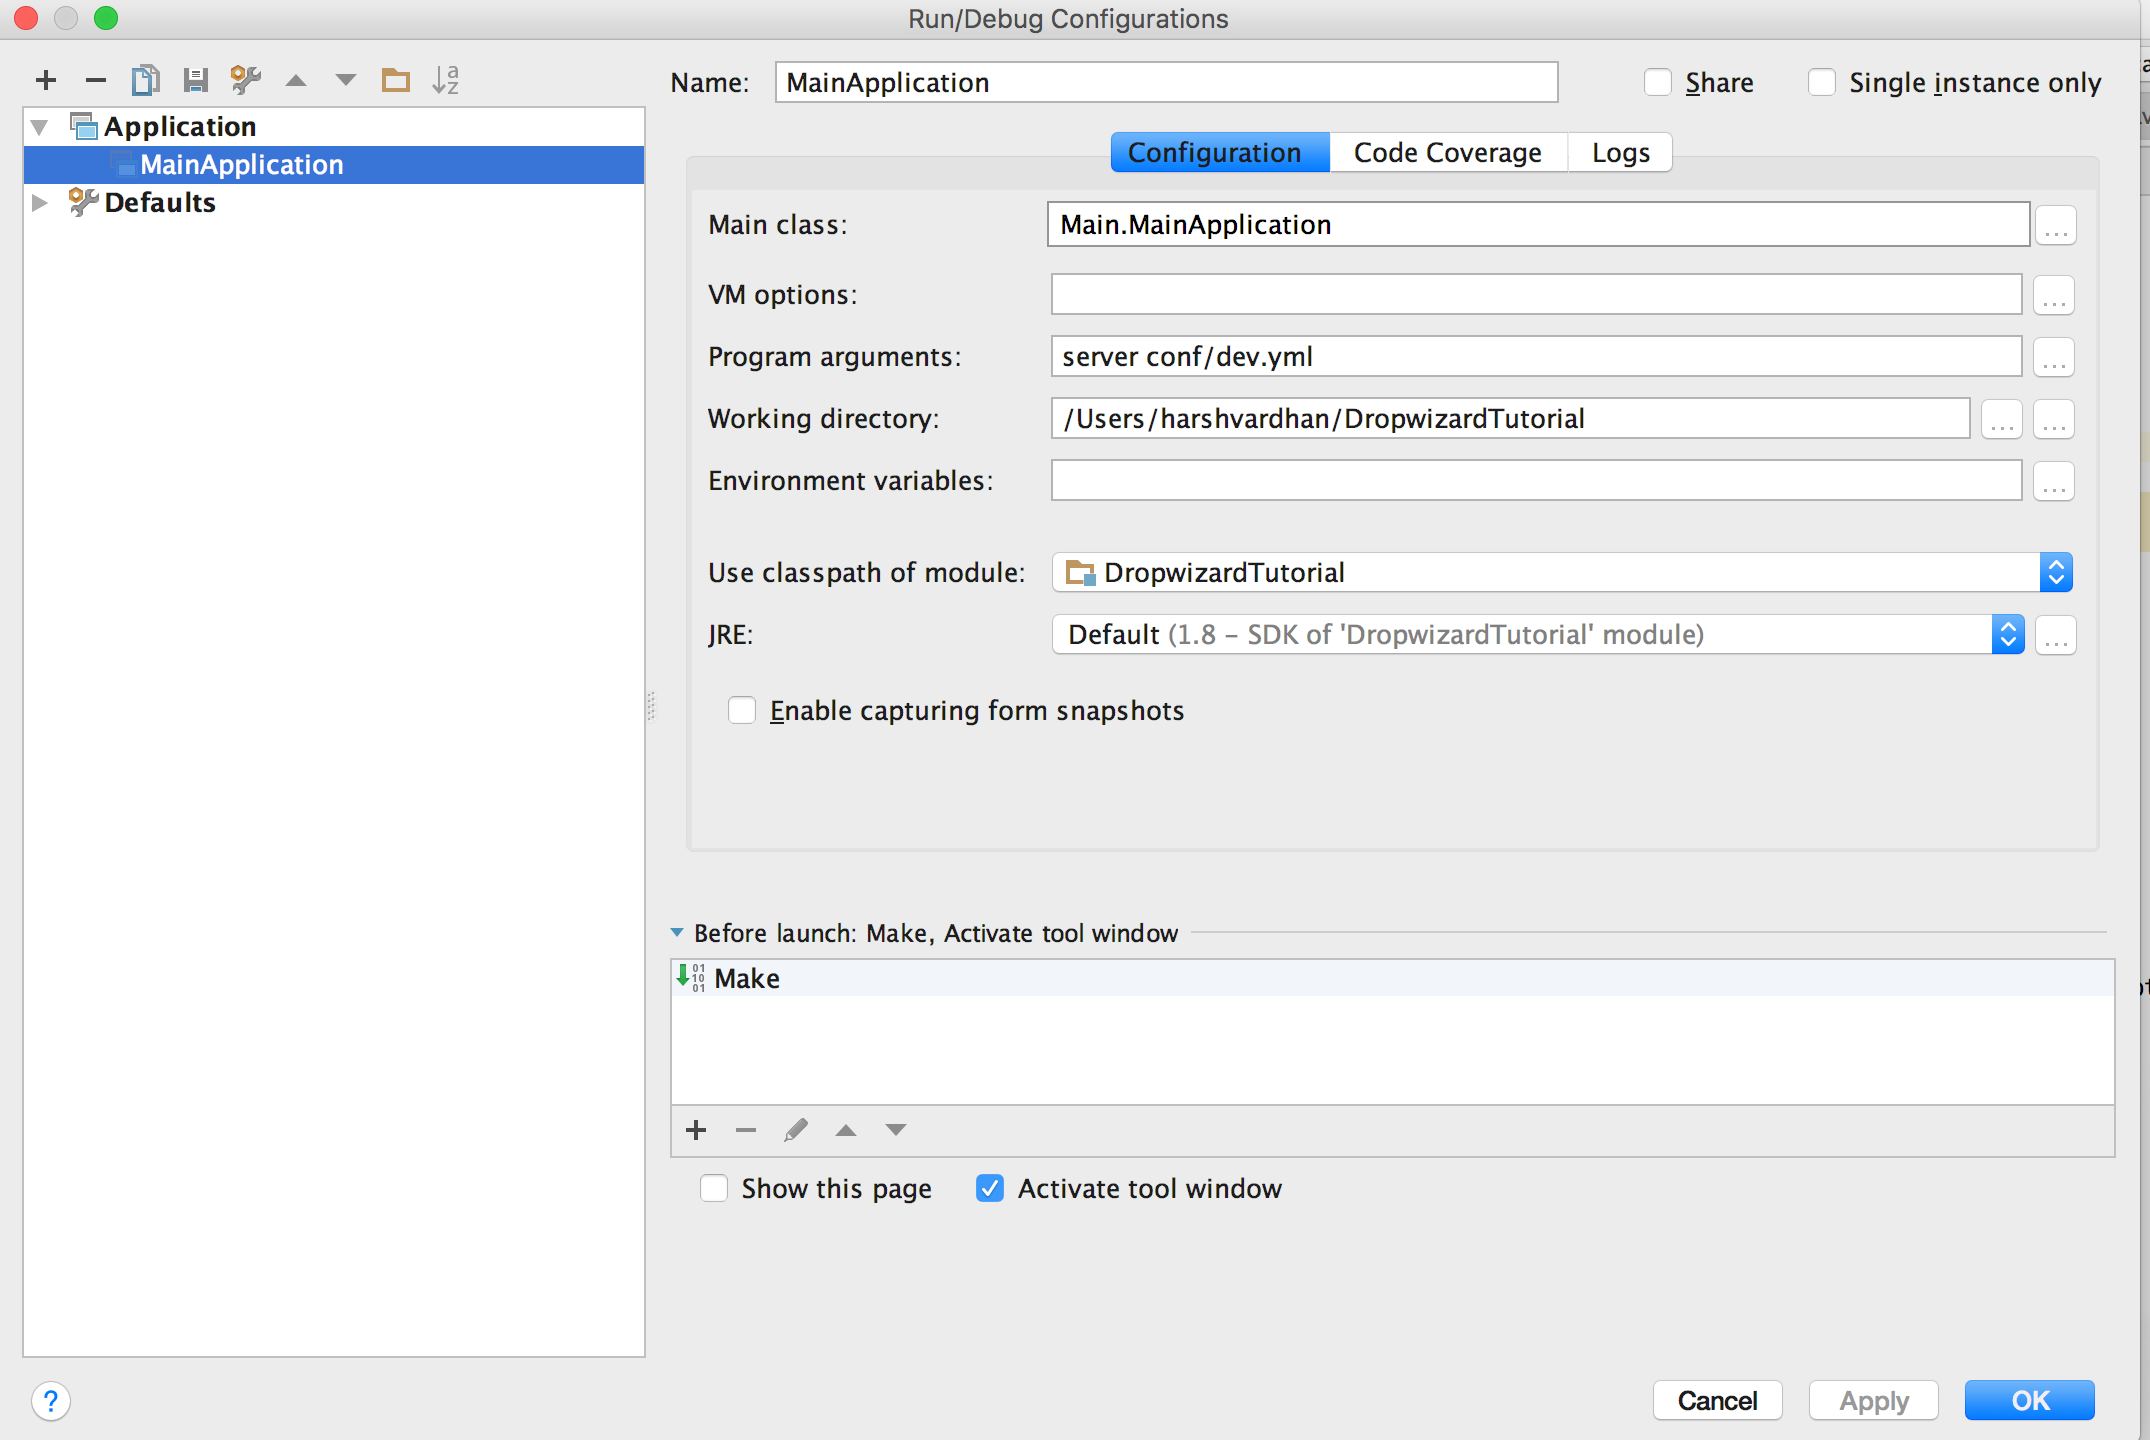
You can now run your project with program argument server dev.yml in your run configuration. Your run configuration should look like this:
If you run it, you should see the url printed in the logs.

At this point, our dropwizard project is running. Now we will add get and post apis.
Add Resource File
| import com.codahale.metrics.annotation.Timed; | |
| import javax.ws.rs.GET; | |
| import javax.ws.rs.POST; | |
| import javax.ws.rs.Path; | |
| /** | |
| * Created by harshvardhan on 12/07/18. | |
| */ | |
| @Path("/resource") | |
| public class MyResource { | |
| @GET | |
| @Timed | |
| @Path("/getName") | |
| public String getName() { | |
| return "Harsh"; | |
| } | |
| @POST | |
| @Timed | |
| @Path("/postName") | |
| public String postName(String name) { | |
| System.out.println("Name given by : "+name); | |
| return "Ok"; | |
| } | |
| } |
Modify MyApplication.java to register your Resource.java
Your MyApplication.java should look like this:
| import io.dropwizard.Application; | |
| import io.dropwizard.setup.Environment; | |
| /** | |
| * Created by harshvardhan on 12/07/18. | |
| */ | |
| public class MyApplication extends Application<MyConfiguration> { | |
| public static void main(String[] args) throws Exception { | |
| new MyApplication().run(args); | |
| } | |
| public void run(MyConfiguration myConfiguration, Environment environment) throws Exception { | |
| final MyResource resource = new MyResource(); | |
| environment.jersey().register(resource); | |
| System.out.println("Value from dev.yml is "+myConfiguration.getUrl()); | |
| } | |
| } |
Again run it. You should see the above-mentioned apis registered and printed in logs.

Please notice /resource/getName and /resource/postName in the logs above.
Your apis are now ready to be used.
Congratulations.
Testing the apis
Please download postman
You can now test the apis. Screenshot of the get api being tested is pasted below:

Follow the following tutorial to connect to database using hibernate.
Further Resource:
Dropwizard official documentation
If you liked this article and would like one such blog to land in your inbox every week, consider subscribing to our newsletter: https://skillcaptain.substack.com
