What is Websocket?
When we run a server side application, we run it on a particular physical port e.g. 8080, 8081. And to access the server side application, we use an IP. Similarly, when we log in to our browser and ask for a particular site, we send to the request our computer’s IP as well as dynamically generated port number. So, we have four items which helps us complete communication between our computer and the server and these four items are unique for every request.
1. Server IP address => It is hidden in URL given to client and known to the client.

2. Server port  => It is also hidden in URL given to us and to the client.

3. Client IP address => Unique for every client

4. Client port => Unique for every client and is generated dynamically
When a client wants to connect to the server, a TCP socket is created to represent that connection at server side. Then, the client sends a packet from the client IP address and from the unique client port number. When the server gets the packet on its own port number, it stores the client IP address and the particular client port number. This separates that client’s traffic from all the other currently connected sockets. Server now triggers an event for that particular socket e.g. fetch the nearest cabs.
The server now wants to send a response to that client. Server derives the client’s IP address and client port number from its stored data and sends it back.
HTTP requests that we are more familiar with does what we just described above. After the response is sent back, it closes the connection. At all times, clients request for the data to server and server returns back the data. Also, there is high overload of initiating a connection.
What happens when we chat or make a tool like google docs?
Client can ask for the data by making a HTTP request at a repeated interval. But this won’t be near time, comes at high overhead of making connection every time and developers are left with lots of corner cases to solve.
– My friend Prathamesh, Amit and friends at work
Now, WebSocket says don’t close that connection until client says so. WebSocket connections start out with an HTTP connection and contains an “upgrade” header requesting the server to upgrade the protocol from HTTP to WebSocket. If the server agrees to the upgrade, then it returns a response that indicates that the protocol will be changed to the WebSocket protocol. In a way, both server and client agrees to change the way they were talking, from HTTP to WebSocket . Meanwhile the same port is servicing other WebSocket as well as HTTP request. After a WebSocket connection is established, server and client can talk bidirectionally and in any order; there is no concept of request and response.
What is STOMP?
STOMP is an abbreviation of Simple Text-Orientated Messaging Protocol. It defines an message semantics so that any of the available STOMP clients can communicate with any STOMP message broker. This enables us to provide easy and widespread messaging interoperability among languages and platforms. The said semantics are for following operations:
- Connect
- Subscribe
- Unsubscribe
- Send
- Transaction
Implementation of Group Chat Using Spring boot
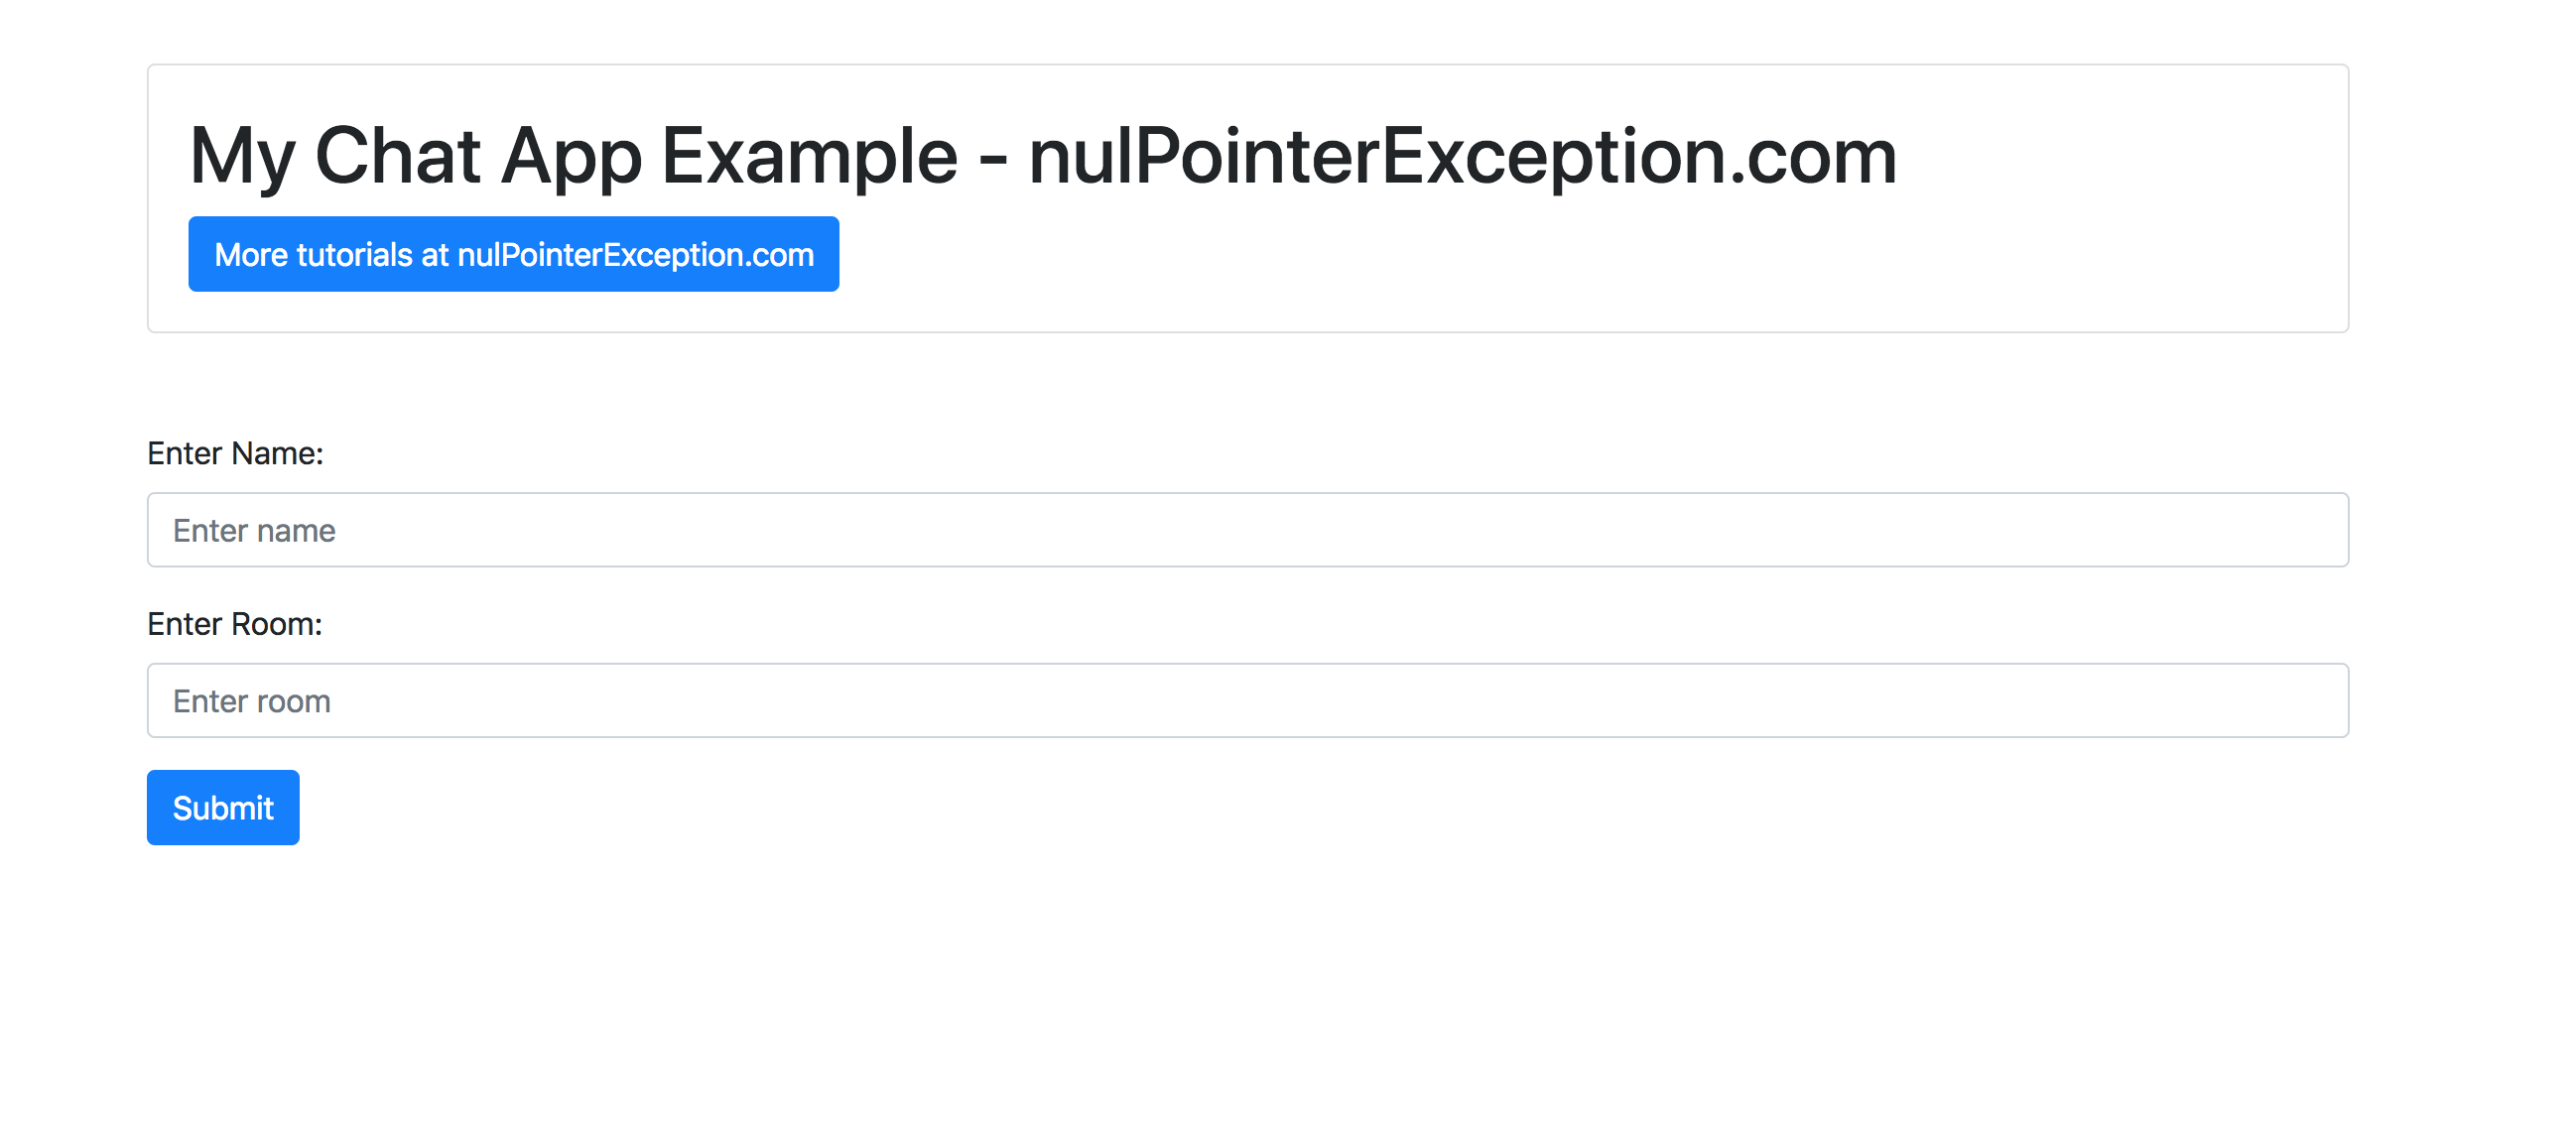
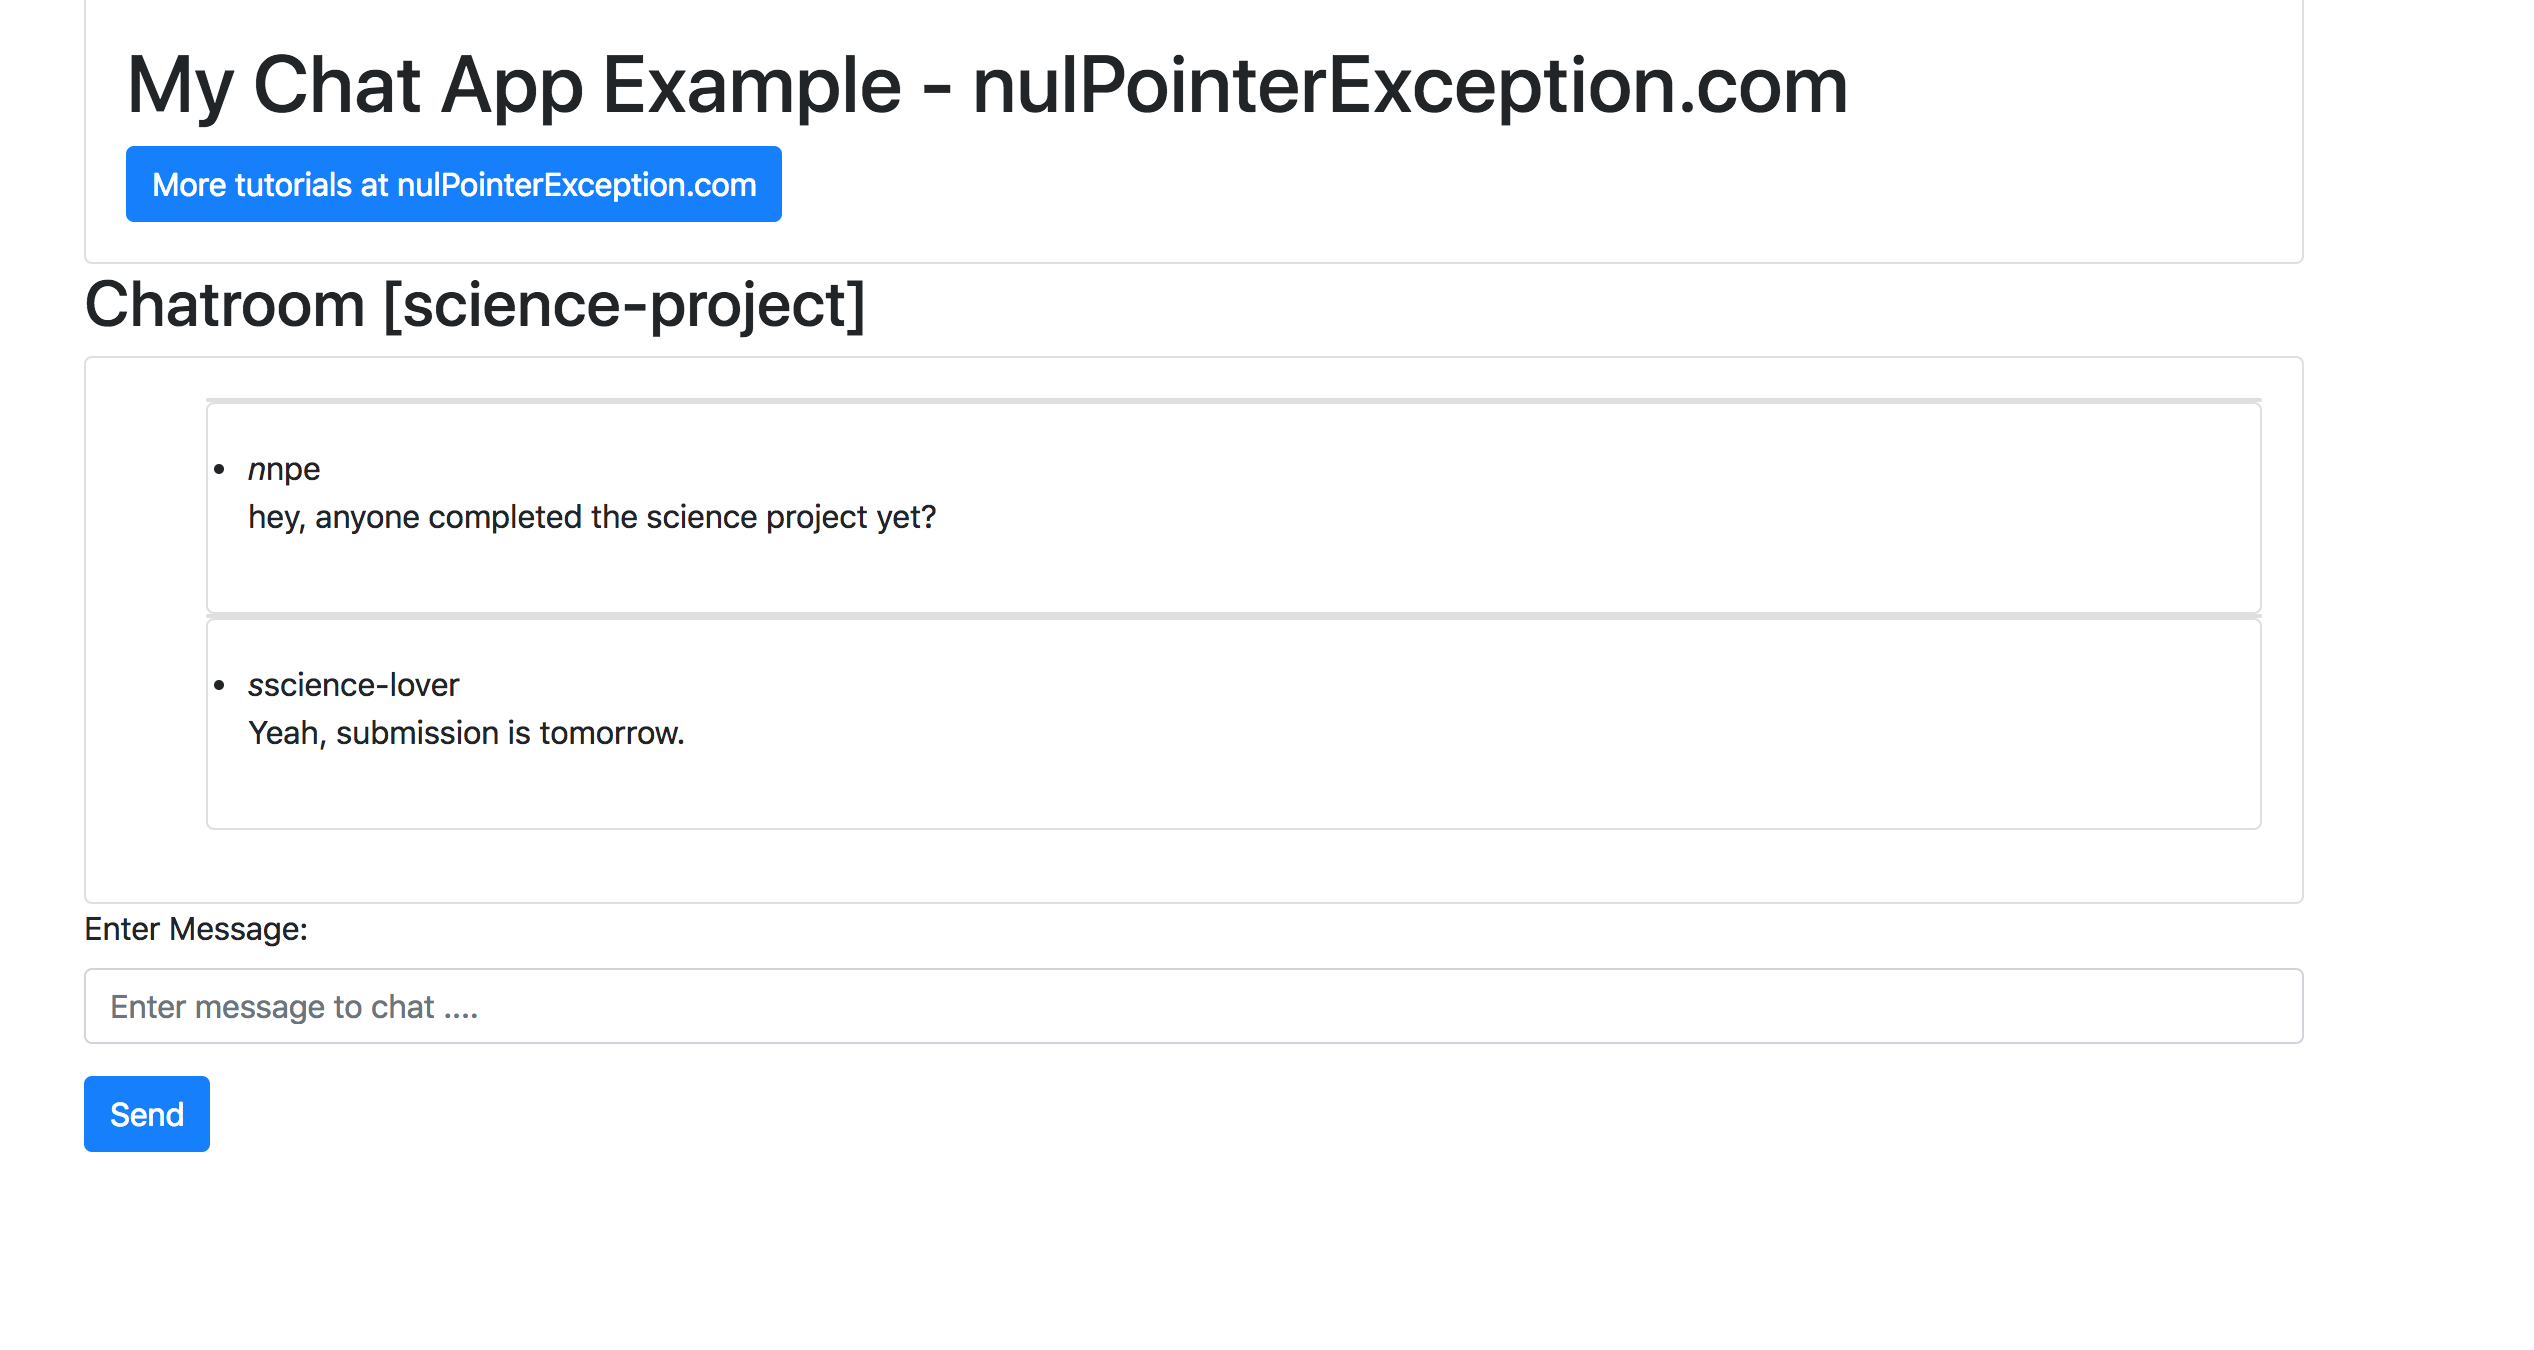
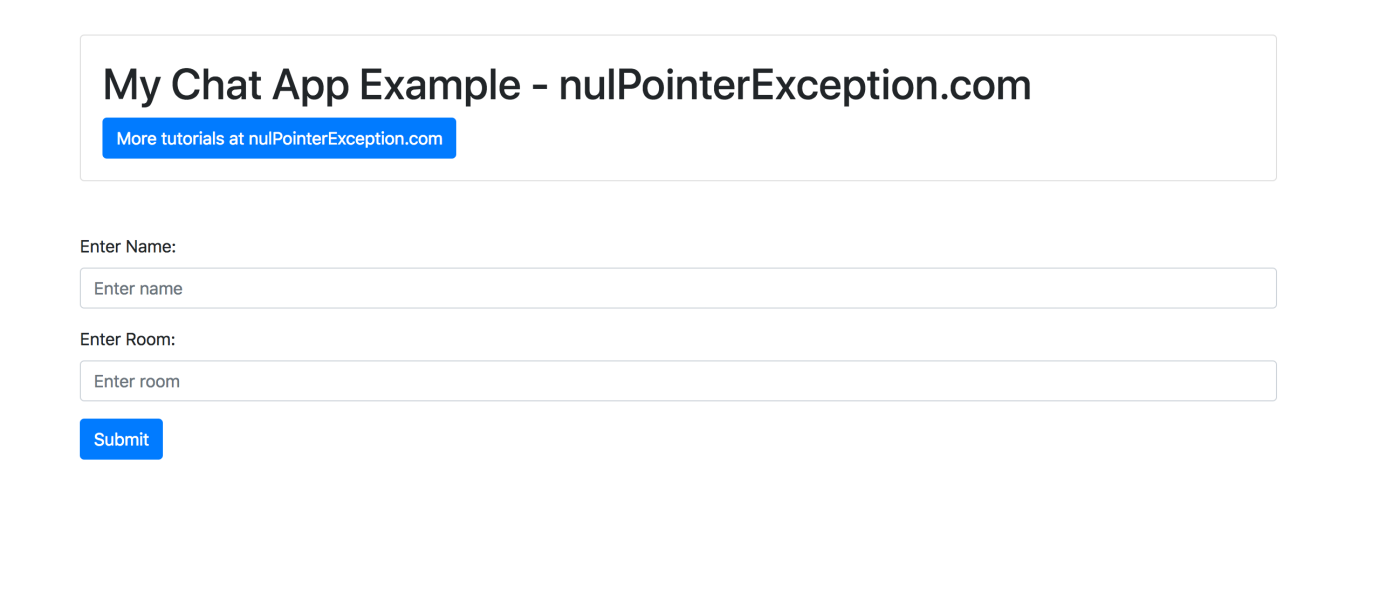
We will implement a whatspp group like chat. This chat app will have following two screen. This project can be easily converted to peer to peer chat. View or clone this project at github.
Generate the project
Log on to https://start.spring.io/. You will see following screen.
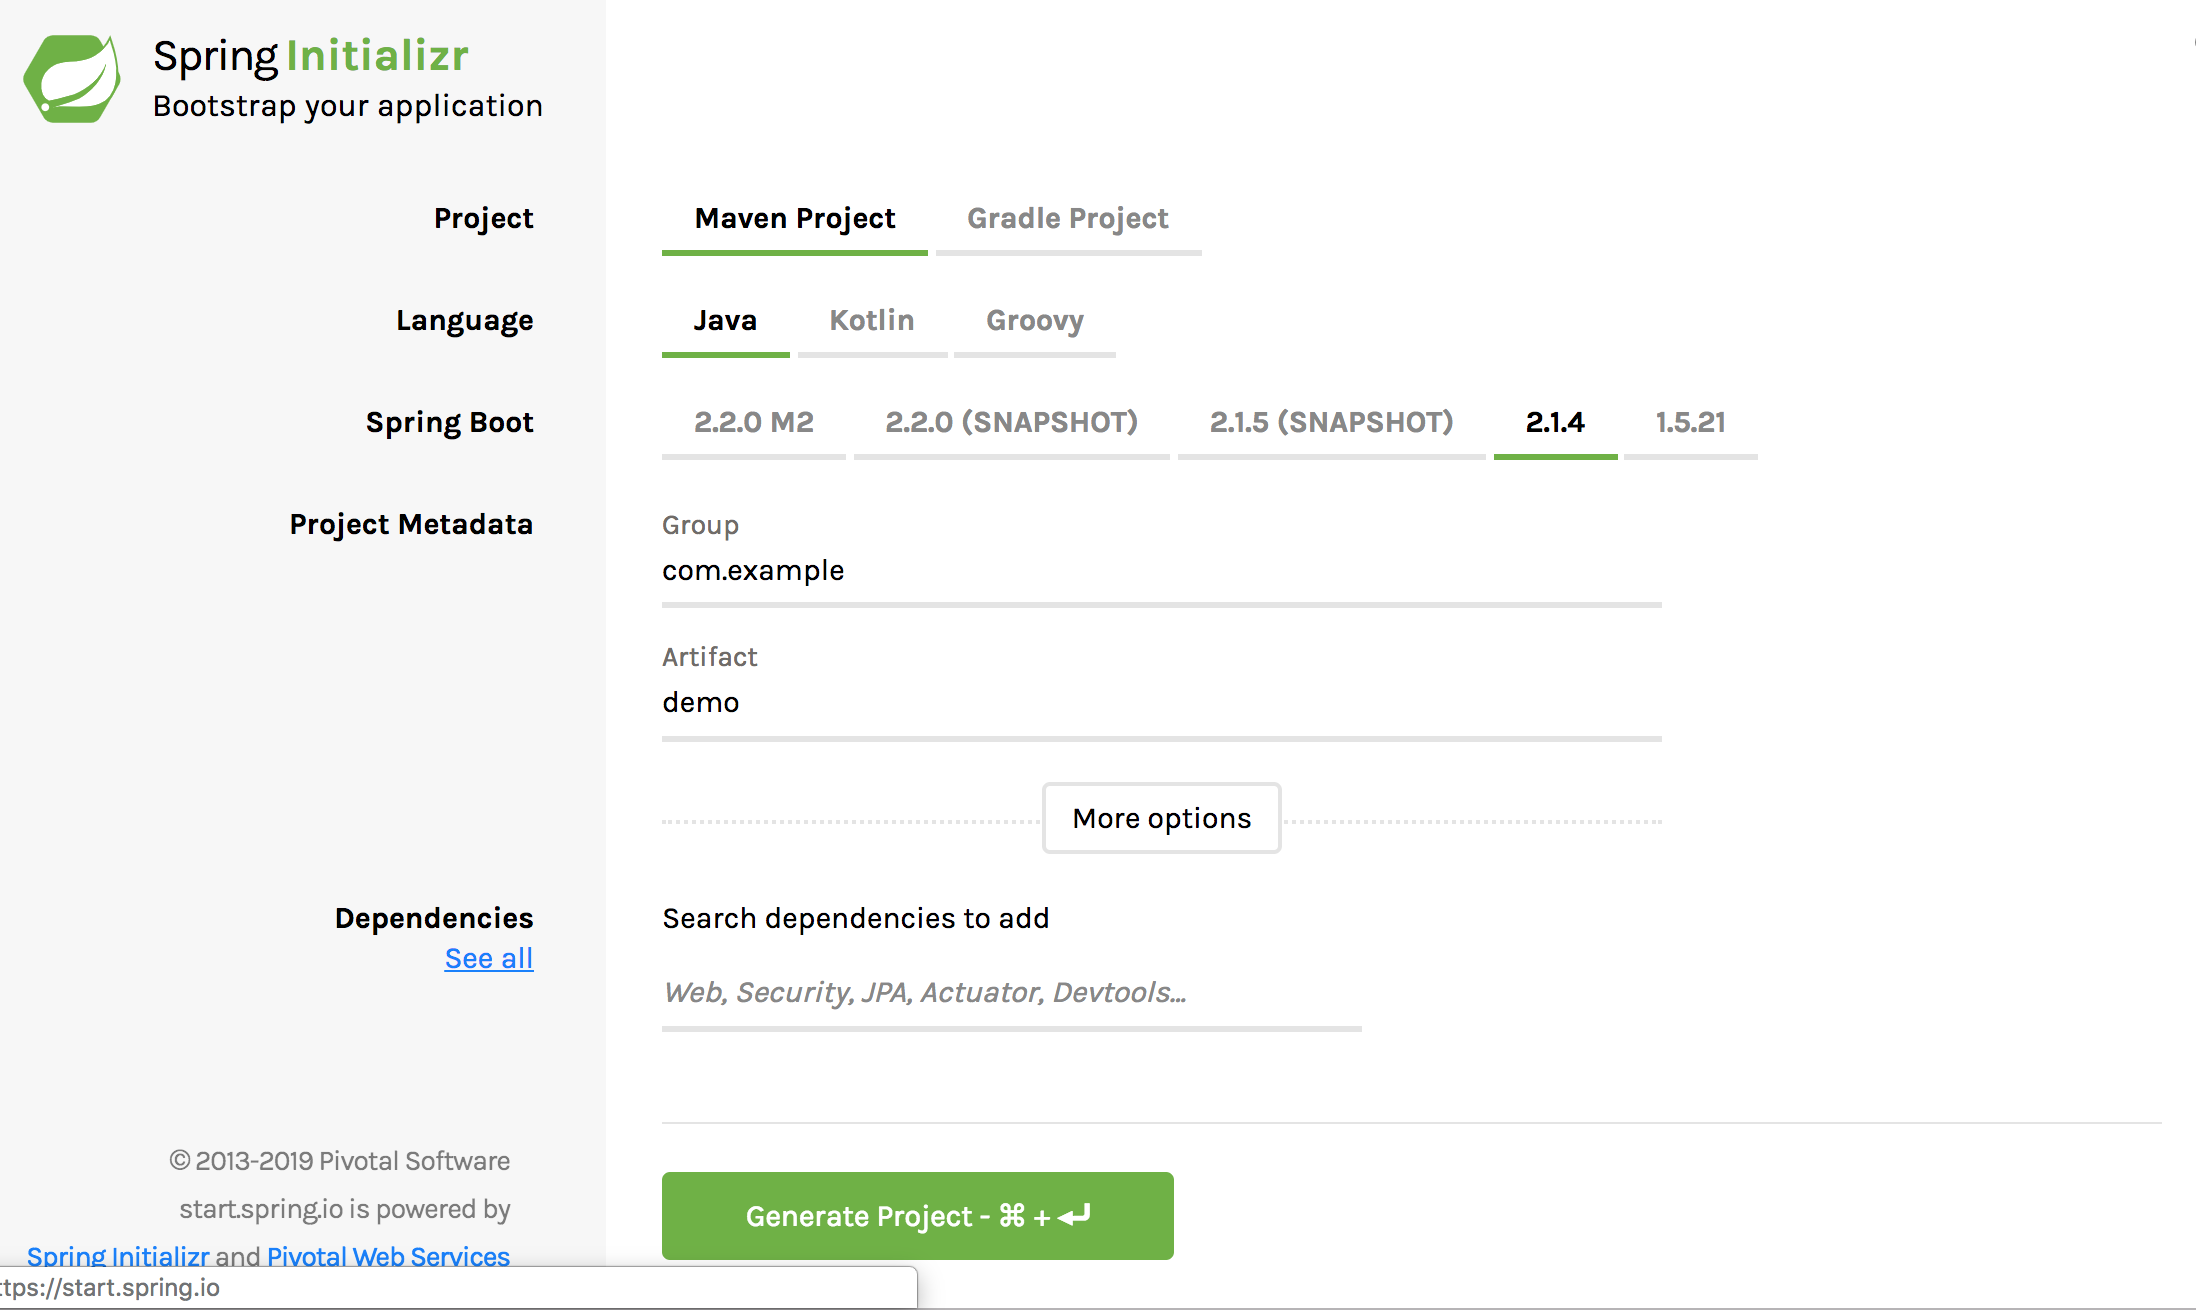
Enter your preference. I generated a maven project. And added Websocket ad the dependency. You can fill up your own artifact id and group id. Click Generate Project and you will see a project getting downloaded soon.
Enabling this project as WebSocket Project
Spring allows us to create a configuration class that enables the project as WebSocket Project. Following is my configuration class:
WebSocketConfiguration class is annotated with @Configuration to indicate that it is a Spring configuration class. It is also annotated @EnableWebSocketMessageBroker that enables this project for WebSocket message handling, backed by a message broker. This class implements WebSocketMessageBrokerConfigurer which has methods to tell the project which MessageBroker has to be used, what is the endpoint for our webSocket. In our case, we have told project to use in-memory message broker. We could have configured external message broker such as rabbit MQ using the configureMessageBroker() method. We have also configured a message broker address as /chat-room which is where client will subscribe themselves. That means any message that will be sent to the /chat-room will be automatically read by all the subscribed clients.
It also designates the /chat-app prefix for messages that are bound for the server. For example, when we will send message, this prefix will be added to our send message address. The registerStompEndpoints() method registers the /sock endpoint to enable SockJS fallback options so as to use alternate transports if WebSocket is not available. This will be more clear when we write about the client.
Creating a event-handling controller
STOMP events can be routed to @Controller classes. For example, we will want methods which can be exposed to the client to add user to the chat or send message. Add this controller:
/Here, The @MessageMapping annotation ensures that if a message is sent to destination /chat/{roomId}/sendMessage, sendMessage() method is called. Here, the destination is dynamically generated. The method in our case, sends the message to the message broker at the /chat-room/{roomId}. Now all the subscribed client at the said topic will get message automatically.
Creating a model of event
This is how we will send the event to the controller.
Dependencies
Main Class
Browser HTML page to serve as client
Associated JS file
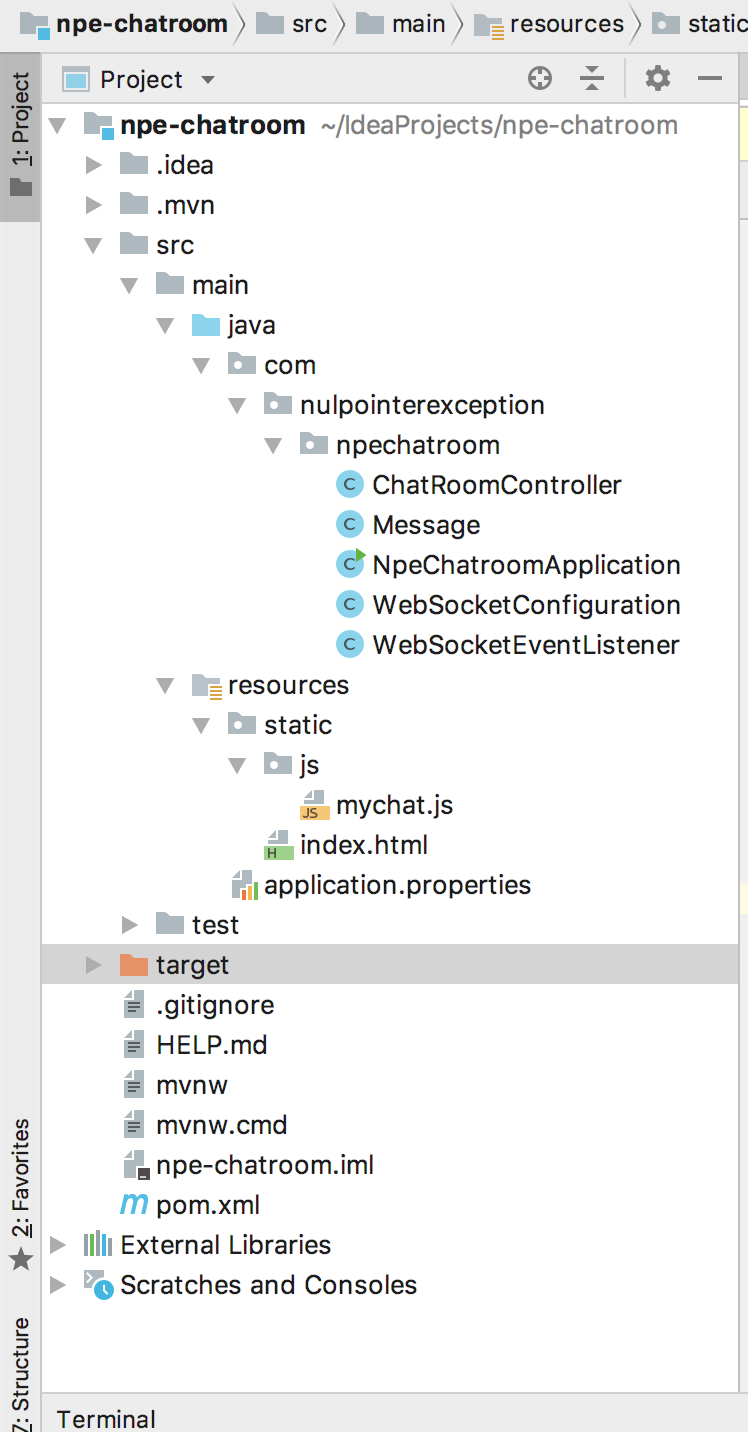
Final Project Structure
Run the project
In the project directory:
mvn package
java -jar target/npe-chatroom-0.0.1-SNAPSHOT.jar
You got to replace your jar file name in case its different.
Debugging
Posting screenshot of my terminal log while the application starts. Please notice the highlighted log in your logs.

Clone the project from github
Reference and Further Reading
SO answer on understanding websocket
A sincere thanks to Rajeev Singh at Callicoder for his awesome tutorial.
If you liked this article and would like one such blog to land in your inbox every week, consider subscribing to our newsletter: https://skillcaptain.substack.com
Github link is empty 😦
LikeLiked by 1 person
Sorry about that. It’s updated.
LikeLike
I want to Implementing a Chat Application like Whatsapp with image sharing, profile icon and single chat, can you please guide me.
LikeLike
Sure. Let me know what help do you need.
LikeLike