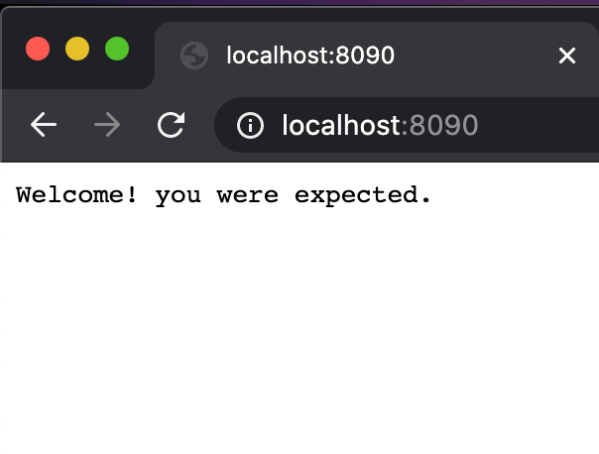
GoLang Journey – Composite Types

You might want to read the previous post in the series.

Composite types created by combining the basic types like int, float etcetra.

Arrays

  • An array is a fixed length sequence of zero or more elements of particular type
  • Because of the fixed length constraints, Arrays are rarely used in Go
  • if “…” appears in place of length, that means the length of array is determined by number of initialisers
  • Size of array is part of it’s type, so [7] int is different from 9[int]
func main() {
var a [3]int = [3]int{1,2,3}
fmt.Println("Element at index is",a[1])
fmt.Println("Length of array is",len(a))
for i, v := range(a){
fmt.Printf("Index is %d, and value is %d \n",i,v)
}
q := []int{1, 2, 3}
fmt.Println("Length of array is",len(q))
}
view raw array.go hosted with ❤ by GitHub
Output:
Element at index is 2
Length of array is 3
Index is 0, and value is 1
Index is 1, and value is 2
Index is 2, and value is 3
Length of array is 3

Slices

Slices are variable length sequences of elements the same type. A slice type is []T where T is the type of element.

  • A slice is a dynamically-sized flexible view into the elements of an array
  • A slice has three components: A pointer, length and a capacity
  • Unlike Arrays, slices are not comparable. We can not use “==” operator to test whether both slices have same elements or not
  • The built-in append function append s items to slices
func main() {
cricketer := []string{1:"Sachin", 2:"Ponting", 3: "Waugh", 4: "Zaheer", 5: "Waqar", 6:"Lee"}
batsman := cricketer[1:4]
bowler := cricketer[4:7]
fmt.Println(batsman)
fmt.Println(bowler)
cricketer = append(cricketer, "McGrath")
fmt.Println(bowler)
fmt.Println(cricketer)
}
view raw slicesDemo.go hosted with ❤ by GitHub
Output:
[Sachin Ponting Waugh]
[Zaheer Waqar Lee]
[Zaheer Waqar Lee]
[ Sachin Ponting Waugh Zaheer Waqar Lee McGrath]

Maps

  • Map is an unordered collection of key and value pair
  • Keys are distinct
  • Update, insert, delete operations are in constant time
  • Key must be comparable using “==”
  • Maps can not be compared with each other
func main() {
students := make(map[int]string)
students[0] = "Harsh"
students[1] = "Yash"
fmt.Println(students)
delete(students, 1)
fmt.Println(students)
students[1] = "Jain"
for roll, name := range students{
fmt.Printf("Roll number of %s is %d \n",name, roll)
}
}
view raw mapsDemo.go hosted with ❤ by GitHub
Output:
map[0:Harsh 1:Yash]
map[0:Harsh]
Roll number of Harsh is 0
Roll number of Jain is 1

Struct

A struct is an aggregate data type that groups together zero or more named values of arbitrary types as a single entity. Like student data containing it’s id, name, class etc.

package main
import "fmt"
type Student struct {
Name string
Address string
Class string
}
func main() {
s := Student{"ABC", "XYZ", "X"}
fmt.Printf("%s lives in %s and studies in %s",s.Name, s.Address, s.Class)
}
Output:
ABC lives in XYZ and studies in X
  • If all the fields of struct are comparable, struct is comparable

JSON

  • JavaScript Object Notation (JSON) is a standard notation for sending and receiving structured information
  • Converting from Go data structure to JSON is called marshaling
  • Converting from JSON to Go data structure is called unmarhsaling
package main
import "fmt"
import "encoding/json"
var m map[string]string
var mDup map[string]string
func main() {
m = make(map[string]string)
m["key1"] = "value1"
m["key2"] = "value2"
m["key3"] = "value3"
fmt.Println(m)
data, _ := json.Marshal(m)
fmt.Printf("%s\n", data)
dataIndent, _ := json.MarshalIndent(m, "", " ")
fmt.Printf("%s\n", dataIndent)
err := json.Unmarshal(dataIndent, &mDup)
if err != nil {
fmt.Println(err)
}
fmt.Println(mDup)
}
view raw json-demo.go hosted with ❤ by GitHub
Output:
map[key1:value1 key2:value2 key3:value3] {"key1":"value1","key2":"value2","key3":"value3"} 
{
"key1":"value1",
"key2":"value2",
"key3":"value3"
}
map[key1:value1 key2:value2 key3:value3]

Reference

Download Go

The Go Programming Language – Chapter 4 – Alan Donovan

GoLang Journey – Basic Data Types

You might want to browse the previous post on this series.

Integers

  • Go provides both signed and unsigned integer type
  • There are four different size of signed integer type; 8, 16, 32, 64 bits, represented by int8, int16, int32 and int64
  • Similarly there are four different size of unsigned integer types; 8, 16, 32, 64 bits, represented by uint8, uint16, unit32 and uint64
  • There are also two types called int and unit which is the most efficient size for signed and unsigned integer on a particular platform
  • int is the mostly used type
  • There should not be any assumption about size of int as different compilers make different choice even on identical hardwares
  • rune is a synonym for int32 and is mostly used for a unicode value
  • byte is synonym for uint8
  • uintptr – Unsigned int which is used to hold all bits of a pointer value, length is unspecified
  • Explicit conversion needed for transferring value from one type to another i.e. to say, int32, int64 and int are three different values
  • Signed integer is in 2’s complement form
  • Remainder operator (%) is used only for int
  • The sign of remainder is always the sign of dividend, so (-7%5) and (-7%-5) both values to -2
  • After an arithmetic operation, if the result size is more than what we can represent in the result type, it is said to overflow. The higher order bits are simply discarded

Floating Point Numbers

  • Go provides two size of floating point numbers, float32 and float64
  • float64 should be preferred for most purpose as in case of float32, error accumulates rapidly
  • Digits may be omitted before or after decimal value, .98 and 3. are both legal declaration
  • Scientific notation using e is supported as well and is used in case of very large or very small number
const Avogadro = 6.02214129e23
  • Floating points are printed using %g verb

Complex Numbers

  • Go provides two size of complex numbers, complex64 and complex128 whose components are float32 and float64
  • The built-in functions create a complex number from its real and imaginary components
  • The built-in real and imag functions extract these components
package main
import "fmt"
func main(){
var x complex128 = complex(1, 2)
var y complex128 = complex(3, 4)
fmt.Println(x*y)
fmt.Println(real(x*y))
fmt.Println(imag(x*y))
}
view raw complex.go hosted with ❤ by GitHub
(-5+10i)
-5
10

Boolean

  • Two possible values – True and False
  • Boolean values can be combined with AND and OR operator

Strings

  • A string is an immutable sequence of bytes
  • Text strings are conventionally interpreted as UTF-8 encoded sequences
  • The built-in len function returns the number of bytes in a string
  • Index operation s[i] retrieves the byte at i-th index of string s
  • Attempting to access a byte outside this range results in a panic
  • The substring operation s[i:j] yields a new string consisting of the bytes of the original string starting at index i and continuing up to, but not including, the byte at index j.
  • The i-th byte is not necessarily i-th character as URL encoding of non ASCII requires two or more bytes
  • Strings may be compared with comparison operators like == and < and this comparison is done byte by byte

Constants

  • Constants are the expression whose value is known to the compiler
  • Evaluation of Constant is done at the compile time and not run time
const pi = 3.14159
  • We may omit the right-hand side expression for all but the first of the group, implying that the previous expression and its type should be used again in case of sequence of constants
const (
a=52
b
c= 27
d
)
fmt.Println(a, b, c, d) 

Output :: "52 52 27 27"
  • The constant generator iota may be used to create a sequence of related values without spelling out each one explicitly. This is also known as enums
type Weekday int
const (
Sunday Weekday = iota
Monday
Tuesday
Wednesday
Thursday
Friday
Saturday
)
This declares Sunday to be 0, Monday to be 1, and so on

Read the next post in the series.


Reference

The Go Programming Language – Chapter 3 – Alan Donovan

GoLang Journey – Program Structure

Names

The name of go functions, variables, constants, types and packages abide by following rules:

  • Name begins with a letter or underscore
  • Name can have any number of additional letters, digits as well as underscores
  • Case in name matters; list and List are two different names
  • Go has 25 reserved words like if, map, package, go etcetera
  • If name begins with uppercase, it can be used outside it’s own package; example Printf of fmt package
  • Package names are in lower case
  • Names go bigger and have more explainable name as their scope increases, for example, name i is perfectly fine for a small loop
  • Name follows camel case notation

Declaration

  • Go program is stored in one or more files that ends with .go extension
  • Each file begin with a package name that says which package this file is part of
  • Package declaration is followed by the import declaration
  • import declaration is followed by package level declaration of constants, types, variables and functions in any order
package main
import "fmt"
const boilingF = 212.0
func main(){
var f = boilingF
var c = (f 32) * 5/9;
fmt.Printf(" boiling point in Centigrade %g and in Fahrenheit %g \n", c, f);
}

Here, boilingF is package level entity, i.e. visible through out the package.

Output of the code is:

boiling point in Centigrade 100 and in Fahrenheit 212

Variables

var name type = expression 
var name = expression
var name type

All three declarations are legal. If the type is omitted as in the second initialisation, type is inferred from the expression. If the expression is not given as in the third case, variable is initialised with zero value which is “” for strings, 0 for numbers and false for booleans and nil for others.

  • There is no uninitialised variable in Go
  • var i, j, k int – Initialises three variable of type integer
  • var f, err = os.Open(name) – Method Open returns and initialises file and error

Short Variable Declaration

t := 0.0

In the expression above, we have declared and initialised a variable called t with 0.0.

  • Takes the form of variableName := initialisation
  • Used for the majority of the local variable
  • If the variable is already declared in that lexical block, short variable declaration acts as assignment

Pointers

A variable stores some value. A pointer has address of the variable.

func main(){
f := 100
x := &f
fmt.Printf(" value of f is %d and the address where f is stored %x \n", f, x);
*x = *x * 2
fmt.Printf(" value of f is %d and the address where f is stored %x \n", f, x);
}
view raw pointerDemo.go hosted with ❤ by GitHub

Consider the example above.

We have initialised a variable called f whose value is 100. Now, we have a variable called p which stores the address of f. &f basically gives the address of the f. We can access the value stored in that address by *p.

The output of the program above is:

value of f is 100 and the address where f is stored c000016040
value of f is 200 and the address where f is stored c000016040

The new Function

p := new(int)

New Operator is another way of declaring the variable.

Type Declarations

There are variables that share the same representation but they vary in the significance. And int may be loop index or timestamp or goal scored.

type Score int

In this example, we have made a type called Score where the underlying type is int.

  • Type Declaration occurs at package level
  • Conversion from one type to the other is allowed if the underlying type is same
  • Two values of different named type can not be compared directly

Package And Files

Packages in Go are for the same reason as libraries or modules in other languages. They provide a way for encapsulation, modularity as well as reuse.

  • In Go, exported identifiers start with an upper-case letter. Export is same as public method/variable/enum in Java or c++
  • It is an error to import a package and then not use it
  • It is suggested to use goImports tool which takes care of insertion and removal of imports

Package Initialisation

  • Package level variables are initialised in the order they are declared except for the dependencies which takes precedence
  • In case of multiple .go files, compiler is given .go file in the sorted order by name
  • There are init methods that can not be called or referenced
  • init functions are automatically executed when the program starts in the order in which they are declared in the file
  • one package is initialised at a time in order of the imports in the program. So, a package p that imports q can be initialised knowing fully well that q is initialised
  • main package is last to be initialised

Scope

The Scope of a declaration is the part of the code where a use of declared name refers to that declaration.

  • Scope of declaration is the region of code
  • Scope is compile time property
  • Lifetime of a variable is duration of time when it is referenced by other part of the program
  • Lifetime is run time property

Continue reading the second post of the series.


Reference

Download Go

The Go Programming Language – Chapter 2 – Alan Donovan

A Tutorial To Completable Future in Java

Motivation for Completable Future

Remember the guy Future?

One which used to do tasks for us in a separate thread and return a future object where we can get the result.

Let’s refresh the memory with a small code snippet showing Future at work.

ExecutorService executorService = Executors.newFixedThreadPool(5);

Callable customer = () -> {
return findCustomerDetails();
};

Future<String> customerFuture = executorService.submit(customer);

String customerStr = customerFuture.get();

Here, our code will wait until findCustomerDetails() works and return the result or the timeout happens. There is no way, to explicitly complete this future.

Let’s assume, we have to design a booking flow for parking. The flow looks like as follow:

Booking Flow

Future does not provide any way for call back after the completion of getCustomerDetails and getParkingDetails, so that we can start booking operation just after.

We would ideally want to do these three operation chained together, and such chaining is not provided by Future APIs.

Similarly, Exception Handling has to be done outside the future APIs.

Completable Future At Work

We would like to approach completable future through examples.

private static void demoCompletableFuture() {
        CompletableFuture<Void> completableFuture = CompletableFuture.runAsync(() -> {
            System.out.println("Task Running inside completable Future");
        });
    }

Output :: Task Running inside completable Future

In the example above, the runAsync API of completable future takes runnable, which is provided in lambda. The example above does not show any difference between CompletableFuture as well as Future. But we will get to it.

With this introduction and motivation, it’s time to formally define Completable Future.

Definition

Completable Future implements Future. In a way, Completable Future is a future that can be explicitly completed. It can also act as an CompletionStage by providing way to support dependent functions. It also provides way to callback or in other words, support actions that can be triggered on it’s completion.

Salient Features

  • When multiple threads wanted to complete, cancel or completeExceptionally , only one of them succeeds
  • Actions supplied for dependent completions of non-async methods may be performed by the thread used by current completable future or any other caller of completion method
  • Async methods without having an explicit Executor argument are performed using the ForkJoinPool.commonPool()
  • In case of exceptional completion with a CompletionException, methods get() and get(long, TimeUnit) throw an ExecutionException

Usage

No Arguement

CompletableFuture<String> completableFuture = new CompletableFuture<>();
 String value = completableFuture.get();

The above statement will cause program to run forever. Because there is nothing for the completable future to do.

RunAsync

private static void demoCompletableFuture() {
        CompletableFuture<Void> completableFuture = CompletableFuture.runAsync(() -> {
            System.out.println("Task Running inside completable Future");
        });
    }

Output :: Task Running inside completable Future

This has already been explained above. In the example above, the runAsync API of completable future takes runnable, which is provided in lambda.

SupplyAsync

private static void demoSupplyAsync() throws InterruptedException, ExecutionException {
CompletableFuture<String> completableFuture = CompletableFuture.supplyAsync(() -> {
System.out.println("Task Running inside completable Future");
return "I am the returned result";
});
String result = completableFuture.get();
System.out.println(result);
}

Supply Async takes a supplier. Reminder: Supplier is a kind of functional interface that does not take any input but provides an output.

Here, we are giving Completable future a supplier lambda and returning a result which we then get as we would have done in Future.

The output of this program is as follow:

Task Running inside completable Future
I am the returned result

ThenAccept

private static void demoThenAccept() {
CompletableFuture<String> completableFuture = CompletableFuture.supplyAsync(() -> {
System.out.println("Task Running inside completable Future");
return "returned result";
});
CompletableFuture<Void> secondCompletableFuture = completableFuture.thenAccept(result -> {
System.out.println("I am the "+result);
});
}

Let’s say you want to do some action after the completion of a Completable Future. There is nothing to be returned in that action, then you would use thenAccept as shown in the example above. ThenAccept takes input from the previous Completable Future and works on it.

The output of this program is as follow:

Task Running inside completable Future
I am the returned result

ThenRun

private static void demoThenRun() {
CompletableFuture<String> completableFuture = CompletableFuture.supplyAsync(() -> {
System.out.println("Task Running inside completable Future");
return "returned result";
});
CompletableFuture<Void> secondCompletableFuture = completableFuture.thenRun(() -> {
System.out.println("I don't get any input from the previous completableFuture. I am just triggered after it.");
});
}

Suppose you want to trigger some action after the completion of a completable future. And you don’t have any input from the completable feature as well as no output to be returned.

Output would be:

Task Running inside completable Future
I don't get any input from the previous completableFuture. I am just triggered after it.

ThenCombine

private static void demoThenCombine() throws InterruptedException, ExecutionException {
long timeStampStart = System.currentTimeMillis();
CompletableFuture<String> completableFutureFirst = CompletableFuture.supplyAsync(() -> {
System.out.println("Task Running inside completable Future");
try {
Thread.sleep(500);
} catch (InterruptedException e) {
e.printStackTrace();
}
return "one plus ";
});
CompletableFuture<String> completableFutureSecond = CompletableFuture.supplyAsync(() -> {
System.out.println("Task Running inside completable Future");
return "two";
});
CompletableFuture<String> completableFutureThird = completableFutureFirst.thenCombine(completableFutureSecond, (resultOne, resultTwo) -> {
return (resultOne + resultTwo + " is three");
});
String result = completableFutureThird.get();
long timeStampEnd = System.currentTimeMillis();
System.out.println("Time taken in the Completable Future operation is " + (timeStampEndtimeStampStart));
System.out.println("Result is :: "+result);
}

ThenCombine allows to trigger a task after both the CompletableFuture is completed. Here, for example, we took 500ms to complete completableFutureFirst and after that, as soon as completableFutureSecond is completed, completableFutureThird is triggered.

Output is:

Task Running inside completable Future
Time taken in the Completable Future operation is 563
Result is :: one plus two is three

Complete

private static void demoCompletableFutureComplete() throws InterruptedException, ExecutionException {
CompletableFuture<String> completableFuture = new CompletableFuture<>();
//String value = completableFuture.get();
//The above statement will cause program to run forever.
// Because there is nothing for the completable future to do.
completableFuture.complete("Completing the completable future with this default text");
String value = completableFuture.get();
System.out.println("Value After Complete: "+value);
}

For whatsoever reason, let’s say we have to complete the future, then we need to use completeAPI. Complete API will complete the future with whatever value we give in the arguement.

Output in this case would be:

Value After Complete: Completing the completable future with this default text

CompleteExceptionally

private static void demoCompleteExceptionally() throws InterruptedException, ExecutionException {
CompletableFuture<String> completableFutureFirst = CompletableFuture.supplyAsync(() -> {
System.out.println("Task Running inside completable Future");
try {
Thread.sleep(500);
} catch (InterruptedException e) {
e.printStackTrace();
}
return "oops";
});
completableFutureFirst.completeExceptionally(new RuntimeException("Task in CompletableFuture Failed"));
String result = completableFutureFirst.get();
System.out.println("Result :: "+result);
}

Assume something wrong happened with the task in CompletableFuture and you want to complete it and throw and exception so that the client of your API does appropriate handling of the exception. In such cases, you would use completeExceptionally.

Output for this is as follow:

Exception in thread "main" java.util.concurrent.ExecutionException: java.lang.RuntimeException: Task in CompletableFuture Failed
at java.util.concurrent.CompletableFuture.reportGet(CompletableFuture.java:357)
at java.util.concurrent.CompletableFuture.get(CompletableFuture.java:1895)
at com.company.CompletableFutureAPIUsage.demoCompleteExceptionally(CompletableFutureAPIUsage.java:38)
at com.company.CompletableFutureAPIUsage.main(CompletableFutureAPIUsage.java:20)
Caused by: java.lang.RuntimeException: Task in CompletableFuture Failed
at com.company.CompletableFutureAPIUsage.demoCompleteExceptionally(CompletableFutureAPIUsage.java:36)
… 1 more

Cancel

private static void demoCancel() throws InterruptedException, ExecutionException {
CompletableFuture<String> completableFutureFirst = CompletableFuture.supplyAsync(() -> {
System.out.println("Task Running inside completable Future");
try {
Thread.sleep(500);
} catch (InterruptedException e) {
e.printStackTrace();
}
return "result";
});
completableFutureFirst.cancel(true);
boolean isCancelled = completableFutureFirst.isCancelled();
System.out.println("Completable Future is cancelled :: "+isCancelled);
String result = completableFutureFirst.get();
System.out.println("Result :: "+result);
}
view raw demoCancel.java hosted with ❤ by GitHub

You can cancel the future if you don’t need it anymore. Further, there is an option to cancel it if it’s running. CompletableFuture.get() throws an exception when you get in a cancelled completable future. isCancelled() API lets you check if it is cancelled or not.

Output is:

Task Running inside completable Future
Completable Future is cancelled :: true
Exception in thread "main" java.util.concurrent.CancellationException
at java.util.concurrent.CompletableFuture.cancel(CompletableFuture.java:2263)
at com.company.CompletableFutureAPIUsage.demoCancel(CompletableFutureAPIUsage.java:37)
at com.company.CompletableFutureAPIUsage.main(CompletableFutureAPIUsage.java:22)


Github link for the programs shown above

https://github.com/rohitsingh20122992/completableFuture


Comparison of Iterative, Future as well as CompletableFuture

package com.company;
import java.util.concurrent.*;
public class Main {
/**
* To book a parking, we need customer details and parking details.
* And we don't need any booking return object for the client, in other word,
* we can make booking process async/
*
* @param args
* @throws InterruptedException
*/
public static void main(String[] args) throws Exception {
//Simple Iterative Approach
showIterativeProcess();
//Using Future
showFutureProcess();
//Using Completable Future
showCompletableFuture();
}
private static void showCompletableFuture() throws InterruptedException, ExecutionException {
System.out.println("===============Completable Future process starts================");
long timeStampStart = System.currentTimeMillis();
CompletableFuture<String> booking = CompletableFuture.supplyAsync(() -> findCustomerDetails())
.thenCombineAsync(CompletableFuture.supplyAsync(() -> findParkingDetails()), (customer, parking) -> book(customer, parking));
System.out.println(booking.get());
long timeStampEnd = System.currentTimeMillis();
System.out.println("Time taken in the Completable Future operation is " + (timeStampEndtimeStampStart));
System.out.println("==========================================");
System.out.println();
}
private static void showFutureProcess() throws InterruptedException, java.util.concurrent.ExecutionException {
System.out.println("===============Future process starts================");
long timeStampStart = System.currentTimeMillis();
ExecutorService executorService = Executors.newFixedThreadPool(5);
Callable customer = () -> {
return findCustomerDetails();
};
Callable parking = () -> {
return findParkingDetails();
};
Future<String> customerFuture = executorService.submit(customer);
Future<String> parkingFuture = executorService.submit(parking);
String customerStr = customerFuture.get();
String parkingStr = parkingFuture.get();
Callable booking = () -> {
return book(customerStr, parkingStr);
};
Future<String> bookingFuture = executorService.submit(booking);
System.out.println(bookingFuture.get());
long timeStampEnd = System.currentTimeMillis();
System.out.println("Time taken in the Future operation is " + (timeStampEndtimeStampStart));
System.out.println("==========================================");
System.out.println();
}
private static void showIterativeProcess() {
System.out.println("===============Iterative process starts================");
long timeStampStart = System.currentTimeMillis();
String customerName = findCustomerDetails();
String parkingName = findParkingDetails();
String booking = book(customerName, parkingName);
long timeStampEnd = System.currentTimeMillis();
System.out.println(booking);
System.out.println("Time taken in the iterative operation is " + (timeStampEndtimeStampStart));
System.out.println("==========================================");
System.out.println();
}
private static String findCustomerDetails() {
System.out.println("****** Finding customer Details ******* Sleeping for 500 ms");
try {
Thread.sleep(500);
} catch (InterruptedException e) {
e.printStackTrace();
}
System.out.println("****** Found customer Details *******");
return "John";
}
private static String findParkingDetails() {
System.out.println("****** Finding parking Details ******* Sleeping for 400 ms");
try {
Thread.sleep(400);
} catch (InterruptedException e) {
e.printStackTrace();
}
System.out.println("****** Found parking Details *******");
return "Mall Road Parking";
}
private static String book(String customer, String parking) {
System.out.println("****** booking parking ******* Sleeping for 700 ms");
try {
Thread.sleep(700);
} catch (InterruptedException e) {
e.printStackTrace();
}
System.out.println("****** Parking booked *******");
return (customer + " has booked a parking at " + parking);
}
}
view raw Main.java hosted with ❤ by GitHub

We have covered all the major concepts. We will try to cover remaining ones in later post.

Reference

Oracle

Callicoder

Baeldung

Introduction to GraphQL Mutation through Java

Prerequisite

If you don’t know about GraphQL, this link is a good place to start. This article would assume that reader has basic knowledge of REST as well as Java.

Mutation

Drawing comparison from REST, any verb (e.g. GET, POST, PUT etc) are able to do server changes. But as convention, we use POST to make new resource and PUT for updating resource. In an almost similar fashion, any query in GraphQL can be used for server side changes, however, we set up a convention that any server side write should be done via mutations.

Extending the example in last post, we will try to write a mutation that creates a driver(i.e. stores the firstName as well as last name) of a given car Id.

Schema Change

type Mutation {
  createDriver(id: ID!, firstName: String!, lastName: String!): 
  Driver!
}

The mutation field returns an object type which in the example shown above is Driver. As in cases of query, we can ask for nested object. This is meant to ask for updated state after the mutation.

Data Provider

We have established in our last post that every field in GraphQL has a data provider associated with it. The one for this simple mutation is not different. We have added a new type for the added mutation as shown below.

.type(TypeRuntimeWiring.newTypeWiring("Mutation")
                        .dataFetcher("createDriver", graphQLDataFetchers.setDriverDataFetcher()))

The updated class should look like one below:

package com.nulpointerexception.cabdetailsgraphQLdemo;
import com.google.common.io.Resources;
import graphql.GraphQL;
import graphql.schema.GraphQLSchema;
import graphql.schema.idl.*;
import org.springframework.beans.factory.annotation.Autowired;
import org.springframework.context.annotation.Bean;
import org.springframework.stereotype.Component;
import javax.annotation.PostConstruct;
import javax.annotation.Resource;
import java.io.IOException;
import java.net.URL;
import java.nio.charset.Charset;
@Component
public class GraphQLProvider {
public static final String SCHEMA_DEFINITION = "schema.graphqls";
private GraphQL graphQL;
@Bean
public GraphQL graphQL(){
return this.graphQL;
}
@Autowired
GraphQLDataFetchers graphQLDataFetchers;
@PostConstruct
public void init() throws IOException {
URL url = Resources.getResource(SCHEMA_DEFINITION);
String sdl = Resources.toString(url, Charset.forName("UTF-8"));
GraphQLSchema graphQLSchema = buildSchema(sdl);
this.graphQL = GraphQL.newGraphQL(graphQLSchema).build();
}
private GraphQLSchema buildSchema(String sdl) {
TypeDefinitionRegistry typeDefinitionRegistry = new SchemaParser().parse(sdl);
RuntimeWiring runtimeWiring = buildWiring();
SchemaGenerator schemaGenerator = new SchemaGenerator();
return schemaGenerator.makeExecutableSchema(typeDefinitionRegistry, runtimeWiring);
}
private RuntimeWiring buildWiring() {
return RuntimeWiring.newRuntimeWiring()
.type(TypeRuntimeWiring.newTypeWiring("Query")
.dataFetcher("cabById", graphQLDataFetchers.getCabByIdDateFetcher()))
.type(TypeRuntimeWiring.newTypeWiring("Cab")
.dataFetcher("driver", graphQLDataFetchers.getDriverDataFetcher()))
.type(TypeRuntimeWiring.newTypeWiring("Mutation")
.dataFetcher("createDriver", graphQLDataFetchers.setDriverDataFetcher()))
.build();
}
}

Data Fetcher

The data fetcher for the mutation field is shown in gist below. Here, we have used a in-memory data storage but this can connect to any database or call some other API as well.

public DataFetcher setDriverDataFetcher() {
return dataFetchingEnvironment -> {
String carId = dataFetchingEnvironment.getArgument("id");
String firstName = dataFetchingEnvironment.getArgument("firstName");
String lastName = dataFetchingEnvironment.getArgument("lastName");
Map<String, String> driverDetails = new HashMap<>();
driverDetails.put("firstName", firstName);
driverDetails.put("lastName", lastName);
driverDetails.put("id", carId);
drivers.add(driverDetails);
return driverDetails;
};
}

Mutation Query

mutation {
  createDriver(id: "car1", firstName: "Prathamesh", lastName: "Waghmode") {
    id
    firstName
  }
}
GraphQL Playground Screenshot

Github repository

GraphQL Mutation Demo


Reference:

GraphQL Java

GraphQL Official

Apollo Blog

Tutorial – Introduction to GraphQL through Java Implementation

Introduction

Assume that we have been given following mockup screens:

A possible rest implementation would have following APIs:

GET /car/{id}

Response:

{
  "id" : "car1",
  "carNumber" : "KA01HK",
  "driverId" : "12"
}

-------------------------------------

GET /driver/{id}

Response:

{
  "id" : "12",
  "firstName" : "Harsh",
  "lastName" : "Vardhan"
}

But!

The first screen only wanted car number on the basis of car id. Why are we sending driverId too. Perhaps this example is too simple to make worth of the extra unnecessary information that we are sending. But imagine the actual production database table of car; it will have colour, data of manufacture, kilometres travelled, chassis number, fuel type and the list goes on.

That’s not the biggest problem on earth. We can any day do something like below to get rid of unwanted information.

GET /car/{id}?include=carNumber

Response:

{
  "id" : "car1",
  "carNumber" : "KA01HK"
}

But that would mean writing as many API signature as number of use cases and more maintenance headache for backend engineers . Also, that means our API is non intuitive. This also increases the stress on documentation. Add to it, more coordination needed between backend and frontend developers.

With this premise, I would like to introduce GraphQL.

GraphQL

Though not exactly, we can take the liberty of saying, GraphQL is to be used instead of REST architecture.

GraphQL is:

  • query language for the API
  • specification
  • collection of tools
  • designed to operate over single endpoint over HTTP
  • optimised for performance
  • optimised for flexibility
  • server-side runtime for executing queries by using a type system we define for our data
  • isn’t tied to any specific database or storage engine 
  • is backed by our existing code and data

For the sake of the tutorial, we will try to show graphQL running for the same mock ups and introduce some concepts on the way. You may download the sample demo project from here and run it as normal java project.

Endpoint

GraphQL is designed to operate on single endpoint over HTTP. Our API is as below:

http://localhost:8080/graphql

We will run it in the GraphQL playground.

Open the graphQL playground and enter the above mentioned link in the URL; select the URL Endpoint above the text box and click open.

Query

For the first screen in the mock up, we need car number based on the car Id. A simple query like the one shown below will be sufficient for the first screen. At this point, do not worry about how did that string “cabById” came into picture. And also do not worry about weird JSON like syntax. We will learn more about it as we go forward.

{
  cabById(id: "car1") {
    id
    carNumber
  }
}
Image showing running the query above

But what if, we want to also have driverId in the response. Simple, just add driver object and ask for id in the query.

{
  cabById(id: "car1") {
    id
    carNumber
    driver{
      id
    }
  }
}
Query with driver id

The point which I am trying to make here is that the endpoint did not change. GraphQL is client driven. It enables clients to ask for exactly what they need and nothing more. It makes it easier to evolve APIs over time.

Now, that we know how does a query runs, let’s see the structure of the query. GraphQL asks for specific fields on objects. Here, in our first query, we are asking for id and car number on the car object that is queried by using it’s id – “car1”. The entity “carNumber” and “id” is known as fields in GraphQL language. The noticeable feature of query and response is that query and result have exactly the same shape. And this is what GraphQL guarantees; you always get back what you expect. The string (“id: “car1”) is called argument in GraphQL language.

Implement a GraphQL Server in Java

If you have stayed with me till now, hopefully you will be answer to the following introductory questions.

  • What is GraphQL?
  • How it is different from REST?
  • How the client uses GraphQL?
  • What is the basic structure of GraphQL?

The next part we will focus on building a GraphQL server. The same one from github which I was using it as example so far and hopefully you must have run it.

We are going to use spring. So, make a java maven project and use the following pom.xml.

Schema

Create a new file schema.graphqls in src/main/resources with the following content:

type Query {
  cabById(id: ID): Cab
}

type Cab {
  id: ID
  carNumber: String
  driver: Driver
}

type Driver {
  id: ID
  firstName: String
  lastName: String
}

It has a top level field called cabById and other fields are self explanatory.

pom.xml

<?xml version="1.0" encoding="UTF-8"?>
<project xmlns="http://maven.apache.org/POM/4.0.0" xmlns:xsi="http://www.w3.org/2001/XMLSchema-instance"
xsi:schemaLocation="http://maven.apache.org/POM/4.0.0 https://maven.apache.org/xsd/maven-4.0.0.xsd">
<modelVersion>4.0.0</modelVersion>
<parent>
<groupId>org.springframework.boot</groupId>
<artifactId>spring-boot-starter-parent</artifactId>
<version>2.3.0.M4</version>
<relativePath/> <!– lookup parent from repository –>
</parent>
<groupId>com.nulpointerexception</groupId>
<artifactId>cab-details-graphQL-demo</artifactId>
<version>0.0.1-SNAPSHOT</version>
<name>cab-details-graphQL-demo</name>
<description>Demo project to learn GraphQL</description>
<properties>
<java.version>1.8</java.version>
</properties>
<dependencies>
<!– https://mvnrepository.com/artifact/org.springframework.boot/spring-boot-starter-web –>
<dependency>
<groupId>org.springframework.boot</groupId>
<artifactId>spring-boot-starter-web</artifactId>
<version>2.2.6.RELEASE</version>
</dependency>
<!– https://mvnrepository.com/artifact/com.graphql-java/graphql-java-spring-boot-starter-webmvc –>
<dependency>
<groupId>com.graphql-java</groupId>
<artifactId>graphql-java-spring-boot-starter-webmvc</artifactId>
<version>2019-06-24T11-47-27-31ab4f9</version>
</dependency>
<!– https://mvnrepository.com/artifact/org.springframework.boot/spring-boot-starter-web –>
<dependency>
<groupId>org.springframework.boot</groupId>
<artifactId>spring-boot-starter-web</artifactId>
<version>2.2.6.RELEASE</version>
</dependency>
<dependency>
<groupId>org.springframework.boot</groupId>
<artifactId>spring-boot-starter-test</artifactId>
<scope>test</scope>
<exclusions>
<exclusion>
<groupId>org.junit.vintage</groupId>
<artifactId>junit-vintage-engine</artifactId>
</exclusion>
</exclusions>
</dependency>
<!– https://mvnrepository.com/artifact/com.graphql-java/graphql-java –>
<dependency>
<groupId>com.graphql-java</groupId>
<artifactId>graphql-java</artifactId>
<version>2020-04-01T09-48-46-c98ebf7</version>
</dependency>
<!– https://mvnrepository.com/artifact/com.google.guava/guava –>
<dependency>
<groupId>com.google.guava</groupId>
<artifactId>guava</artifactId>
<version>28.2-jre</version>
</dependency>
</dependencies>
<build>
<plugins>
<plugin>
<groupId>org.springframework.boot</groupId>
<artifactId>spring-boot-maven-plugin</artifactId>
</plugin>
</plugins>
</build>
<repositories>
<repository>
<id>spring-milestones</id>
<name>Spring Milestones</name>
<url>https://repo.spring.io/milestone</url>
</repository>
</repositories>
<pluginRepositories>
<pluginRepository>
<id>spring-milestones</id>
<name>Spring Milestones</name>
<url>https://repo.spring.io/milestone</url>
</pluginRepository>
</pluginRepositories>
</project>
view raw pom.xml hosted with ❤ by GitHub

Please use your own group Id, artifact id or anyother project specific details.

Main File

The class with main method looks like the one in gist below. This is a simple Spring Boot Application main method.

package com.nulpointerexception.cabdetailsgraphQLdemo;
import org.springframework.boot.SpringApplication;
import org.springframework.boot.autoconfigure.SpringBootApplication;
@SpringBootApplication
public class CabDetailsGraphQlDemoApplication {
public static void main(String[] args) {
System.out.println("****************** GraphQL starts **************************");
SpringApplication.run(CabDetailsGraphQlDemoApplication.class, args);
System.out.println("****************** GraphQL ends **************************");
}
}

Data Fetchers

A Data Fetcher fetches the data for one field while the query is executed. When GraphQL Java is executing a query, it calls appropriate Data Fetcher for each field it encounters in the query. In another words, Every field from the schema has a DataFetcher. If there is not any defined data fetcher for any specific field, then the default PropertyDataFetcher is used. PropertyDataFetcher is the name of field in case of java class or key in case of Map. DataFetcher interface is defined as follow in the GraphQL java code.

Data Fetcher class for our project is shown in the gist below.

public interface DataFetcher<T> {
    T get(DataFetchingEnvironment dataFetchingEnvironment) throws Exception;
}
package com.nulpointerexception.cabdetailsgraphQLdemo;
import com.google.common.collect.ImmutableMap;
import graphql.schema.DataFetcher;
import org.springframework.stereotype.Component;
import java.util.Arrays;
import java.util.List;
import java.util.Map;
@Component
public class GraphQLDataFetchers {
private static List<Map<String, String>> cars = Arrays.asList(
ImmutableMap.of("id", "car1",
"carNumber", "KA01H",
"driverId", "12"),
ImmutableMap.of("id", "car2",
"carNumber", "BR01H",
"driverId", "13")
);
private static List<Map<String, String>> drivers = Arrays.asList(
ImmutableMap.of("id", "12",
"firstName", "Harsh",
"lastName", "Vardhan"),
ImmutableMap.of("id", "13",
"firstName", "Rohit",
"lastName", "Singh")
);
public DataFetcher getCabByIdDateFetcher(){
return dataFetchingEnvironment -> {
String carId = dataFetchingEnvironment.getArgument("id");
Map<String, String> carInStore = cars.stream()
.filter(car -> car.get("id").equals(carId))
.findFirst()
.orElse(null);
return carInStore;
};
}
public DataFetcher getDriverDataFetcher(){
return dataFetchingEnvironment -> {
Map<String, String> carInStore = dataFetchingEnvironment.getSource();
String driverId = carInStore.get("driverId");
return drivers.stream()
.filter(driver -> driver.get("id").equals(driverId))
.findFirst()
.orElse(null);
};
}
}

Our first method getCabByIdDataFetcher returns a DataFetcher implementation which takes a DataFetcherEnvironment and returns a car. We need to get the id argument from the cabById field in the query. We find the car that has the same id as asked in the query and return it.

Our second method getDriverDataFetcher is similar to the first one except for the fact that the carInStore object from first method is made available to it using the getSource method.

Glue in Data Fetcher and Schema

package com.nulpointerexception.cabdetailsgraphQLdemo;
import com.google.common.io.Resources;
import graphql.GraphQL;
import graphql.schema.GraphQLSchema;
import graphql.schema.idl.*;
import org.springframework.beans.factory.annotation.Autowired;
import org.springframework.context.annotation.Bean;
import org.springframework.stereotype.Component;
import javax.annotation.PostConstruct;
import javax.annotation.Resource;
import java.io.IOException;
import java.net.URL;
import java.nio.charset.Charset;
@Component
public class GraphQLProvider {
public static final String SCHEMA_DEFINITION = "schema.graphqls";
private GraphQL graphQL;
@Bean
public GraphQL graphQL(){
return this.graphQL;
}
@Autowired
GraphQLDataFetchers graphQLDataFetchers;
@PostConstruct
public void init() throws IOException {
URL url = Resources.getResource(SCHEMA_DEFINITION);
String sdl = Resources.toString(url, Charset.forName("UTF-8"));
GraphQLSchema graphQLSchema = buildSchema(sdl);
this.graphQL = GraphQL.newGraphQL(graphQLSchema).build();
}
private GraphQLSchema buildSchema(String sdl) {
TypeDefinitionRegistry typeDefinitionRegistry = new SchemaParser().parse(sdl);
RuntimeWiring runtimeWiring = buildWiring();
SchemaGenerator schemaGenerator = new SchemaGenerator();
return schemaGenerator.makeExecutableSchema(typeDefinitionRegistry, runtimeWiring);
}
private RuntimeWiring buildWiring() {
return RuntimeWiring.newRuntimeWiring()
.type(TypeRuntimeWiring.newTypeWiring("Query")
.dataFetcher("cabById", graphQLDataFetchers.getCabByIdDateFetcher()))
.type(TypeRuntimeWiring.newTypeWiring("Cab")
.dataFetcher("driver", graphQLDataFetchers.getDriverDataFetcher()))
.build();
}
}

This GraphQLProvider class has a “init” method that brings everything together and serves as GraphQL server. It parses the schema and attaches appropriate DataFetcher to each field. We will come to this classes again in subsequent post to discuss at length.

Run the code as you would normally run a java code.

At this point your graphQL server would be running. While this post tries to give a brief introduction about graphQL in general and how to use it, this is no way comprehensive and I hope to cover more later.

As always, feel free to drop in suggestion and comments.

Download the project

https://github.com/rohitsingh20122992/cab-details-graphQL-demo

Update

Read second part of this series here.


References:

https://graphql.org/

https://phil.tech/api/2017/01/24/graphql-vs-rest-overview/

https://www.graphql-java.com/tutorials/getting-started-with-spring-boot/

https://blog.apollographql.com/the-anatomy-of-a-graphql-query-6dffa9e9e747

https://www.toptal.com/api-development/graphql-vs-rest-tutorial

Design and code cab hailing service like Uber

We will use Java as programming language. This project will try to cover the following requirements. We will try to first define entities and then services. We will also build class diagram as we proceed as I don’t want to bombard with a picture fill of random boxes and arrows at the end.

If you are new to java, this post will be a good start.

Requirement

  1. Register Rider
  2. Register driver
  3. Book a ride within the given radius
  4. Show ride history of the ride
  5. Update location of the cab
  6. Use In memory database

Design Motivation

Rider Entity

Rider Entity will have following fields:

  • Name
  • Phone Number
  • Country Code
  • List of booking Ids that this consumer has completed

Driver Entity

Driver entity should have following fields:

  • Name
  • Phone Number
  • Country Code

Possibility of abstract class Personal Info

If we notice following fields are common in both the entities:

  • Name
  • Phone Number
  • Country Code

That mean we can safely abstract out a PersonalInfo class which will be extended by both Driver and Rider class. Rider class can have “List of booking Ids that this consumer has completed

At this point, our class diagram should look like one below:

Rider and Driver Entities

Vehicle Entity

Vehicle entity should have following fields:

  • Car Number
  • Latitude
  • Longitude
  • Type – To store type of car, for example: SUV, Compact, Sedan etcetera
  • IsAvailable – To store if the car is available to hire or not.
  • DriverId – We will not tightly couple driver and the vehicle. So, whenever a driver will login, he will pick up one of the vehicle. This field will store the id of driver who is currently driving this vehicle
Adding Vehicle Entity

Booking Entity

Booking entity should have following fields:

  • Booking Id
  • Rider User Id
  • Car Number
  • Start Time
  • End Time
  • Status

Storage Service

The requirement says that we need to use in-memory database. But what if tomorrow, someone asks us to implement the storage in database. Or in cache, something like Redis or memcache.

We will make an IStorageService. This will be an interface which will currently have just one implementation that stores data in-memory using Maps and Lists.

This interface will be like the one shown in gist below:

public interface IStorageService {
Boolean saveRider(Rider rider);
Boolean saveDriver(Driver driver);
Boolean saveVehicle(Vehicle vehicle);
Boolean updateLocation(Vehicle vehicle);
Boolean book(Booking booking);
Vehicle find(Double lat, Double lon, Double maxDistance);
List<Booking> rideHistory(String riderUserId);
Boolean endTrip(Long timeStamp, String bookingId);
}
view raw IStorageService hosted with ❤ by GitHub

Our new class diagram should look like the one below:

Storage Included

Rider Service, Driver Service, Vehicle Service and Booking Service

The first three services will be again have interfaces to save the data of new rider, driver and vehicle. In addition to that, vehicle service should also have contract to find the vehicle near the given position within the given distance as well as a contract to update the position of vehicle.

These three different services will be injected with Storage Service at initialisation so as to store the data.

Booking Service will have Vehicle Service injected in addition to the Storage Service as during booking we need to find vehicles within the given radius.

If you don’t understand this statement right now, its okay. Please wait for the main class at the end. Hope it will be clear then.

The class diagrams looks like this now:

Complete Class Diagram

Download the project

Download the project using the following link.

https://github.com/rohitsingh20122992/cab

Main Class

import booking.models.Booking;
import booking.service.BookingServiceImpl;
import booking.service.IBookingService;
import driver.models.Driver;
import driver.services.DriverServiceImpl;
import driver.services.IDriverService;
import rider.models.Rider;
import rider.services.IRiderService;
import rider.services.RiderServiceImpl;
import storage.IStorageService;
import storage.StorageServiceImpl;
import vehicle.models.Vehicle;
import vehicle.services.IVehicleService;
import vehicle.services.VehicleServiceImpl;
import java.util.List;
public class CabMain {
private static IStorageService storageService = new StorageServiceImpl();
private static IRiderService riderService = new RiderServiceImpl(storageService);
private static IDriverService driverService = new DriverServiceImpl(storageService);
private static IVehicleService vehicleService = new VehicleServiceImpl(storageService);
private static IBookingService bookingService = new BookingServiceImpl(vehicleService, storageService);
public static void main(String args[]){
Rider rider = new Rider();
rider.setName("harsh");
rider.setCountryCode("+91");
rider.setPhoneNumber("910");
riderService.register(rider);
Driver driver = new Driver();
driver.setName("harsh Driver");
driver.setCountryCode("+91");
driver.setPhoneNumber("9431");
driverService.register(driver);
Vehicle vehicle = new Vehicle();
vehicle.setCarNumber("KA01HK");
vehicle.setLat(1D);
vehicle.setLon(1D);
vehicleService.registerVehicle(vehicle);
vehicle.setLat(2D);
vehicle.setLon(2D);
vehicleService.updateLocation(vehicle);
bookingService.book("+91910", 1D, 2D);
List<Booking> bookingHistory = bookingService.history("+91910");
System.out.println("bookingHistory"+bookingHistory);
}
}
view raw CabMain.java hosted with ❤ by GitHub

Drop comment to discuss about the post.

Simple Project Idea in Java for Beginners

Problem Statement: Make a console based java application which support CRUD (Create, Read, Update, Delete) operations for e-commerce domain.

Application should be able to support following features:

  1. Any user should be able to sign up, log in and log out.
  2. Admin should be able to add, update and delete products.
  3. Logged in user should be able to browse products.
  4. Logged in user should have a shopping cart where user should be able to add multiple products.
  5. User should have ability to checkout and total payable should be displayed while checkout
  6. User should have following attributes: name, user id, address, date of birth
  7. Product should have following attributes : name, product id, description and price
  8. User and Product information should be persisted in database
  9. Console should have option for all the operation mentioned above

What will you learn from this?

  • Designing classes to store the user and Product information
  • Taking input from console and storing into models
  • Persisting data in database
  • Database table design
  • Coding best practices like naming of variables, class names, designing helping and service classes

Note: Beginners may get stuck in database connection. It’s advisable to complete this assignment using in memory data structures like list, map, set instead of database in the first phase. As a second stage, you can attempt to do the same assignment using database.


Get started in Java from here

My Learning in Software Engineering

Introduction

The question that frequently pops up during discussion with colleagues and friends is:

 “What’s next?”

The question triggers a debate with very subjective answers which are evolving over time. Three years before, the answers included MS, MBA and startup. I used to work for a unicorn and I decided to join a startup to:

  • Learn about building a company
  • Apply my knowledge and skills that I had acquired
  • Explore the limit of my abilities

As the excitement of the new year sets in, this article is more like a note to self about how I perceive engineering as an organisation.

A random snippet

Engineering as an “org”

Like a company has a mission and vision, which guides the company’s action and strategy; similarly engineering as an organisation within the company should have a vision. It goes unsaid that one of the most important expectations from the engineering  org is business continuity

The term business continuity can be broken down into the following major components:

  • Uptime should be 100%
  • New features are incorporated
  • Bugs are solved
  • Latencies are within reasonable limits

Now, engineering org should have a mission and vision that could be derived from something that threatens the business continuity. For example, if the problem is attrition, which might lead to decrease in count of new features incorporated.  Then the mission could be to hire and mentor talents. Similarly, if there are high count of bugs, the mission could be to do exhaustive testing with a long term vision of having more than 95 percent unit test code coverage.

Process

Any established company has set processes for the business continuity. Startups on the other hand are limited by the resources that they have. There is always a shortage of manpower. Setting up new processes with a startup can also be perceived as a nuisance as it might lead to unnecessary bureaucracy. This is detrimental for a startup environment where turnaround time is worshipped metric by non-engineering stakeholders. 

In this scenario, the answer to the following question is something to be thought upon:

“How would you set up processes while taking buy-in from every stakeholder?”

One possible way could be proper communication of metric that stakeholders hold dear to them which is improved by setting up process. For example, engineering org decides to have a dedicated engineer to solve production bugs which results in reduction of turnaround time reduction from four days to one day. That’s 75% improvement and should be communicated to operation team about the advantage of having a dedicated on-call.

Refactoring

Refactoring is an exercise that has to be taken up periodically. New features frequently modifies existing flows to accommodate feature requirements. In most cases, unit tests take backseat as startups are always fighting for survival. With “time to market” as one of the important metrics to measure efficiency of engineering org, code is more prone to bugs and break some other existing feature silently. As such, there is a constant need to refactor small parts to control the chaos. Again, convincing all the stakeholders about refactoring could be a tough sale, provided refactoring does not directly lead to any change in measurable metrics. One observation is badly designed or coded module almost always result in regression bug. One way to attribute advantage of regression could be the reduction in the count of regression bugs.

Documentation

Documentation is a key area which is always neglected, both in terms of tech and product. We tried addressing this issue by rigorous tech grooming session where each of the features being developed is presented before the engineering team. The presented tech document usually contains the architecture diagram, class diagram and related notes. Such initiatives have helped in more mature designs because of the involvement of the whole team in developing design. Audience is someone who has worked on the module before, or someone who has solved bug related to the  module or someone who makes an intelligent remark which is easy to be missed. 

Such open discussions also mature to sharing knowledge about the tech concepts, both trivial and the advanced topic.  Another result of discussion is possible points for roadmap when someone in the room asks:

“Isn’t this use case for Golang?”

“Shouldn’t we use some other design pattern?” 

Proper documentation in terms of product features is always challenging. Product features are usually code with lot of configurability at different levels and stored in different data stores. With time, many less used flags/features are forgotten and there are always new features which conflict with existing feature. 

Mentorship

Mentorship is all about enabling people. Mentorship is not about providing the fast paced solution rather, it is about enabling them to face problems. First step to mentor someone is to make them trust their abilities and making them sync with the feeling that “they belong there”. Subsequently, It’s important to let them challenge themselves by finding solutions on their own. There should be an honest debate about the solution in order to further improve it. There should be necessary freedom as well as close monitoring in order to provide them with nudges to improve. 

Did you hear,”Filtering a list to get unique? Why not use set instead?”

Another interesting observation is to ask, “What is a good code?” The keywords in answers will be “fast”, “maintainable”, “extendable”, “modular” and “reusable”. A good way for someone to improve is to make them evaluate their own code with respect to the definition of “good code”. Chances are code is going in the right direction.

Another important aspect of mentoring is to make people aware of the environment. Someone develops a feature. How about asking them following questions:

“What’s the response time?”

“Could you use cache to improve response time?”

“But does using cache increase hardware cost?”


That sort of sums up the 2019 experiences. There are things which could have been better. But I guess it’s okay to make mistakes and learn from them.

Praying for a happy new year for everyone.

Using Guice for Dependency Injection

Prerequisite

For Injecting dependency using guice, you should first know what is Dependency Injection. Please go through this article to understand Dependency Injection.

Introduction

Now that we know what is Dependency Injection, we can use it in our code. With dependency injection, objects accept dependencies in their constructors. To construct an object, you need first to build its dependencies. But to build each dependency, you need its dependencies, and so on. So when you build an object, you really need to build an object graph.

Here guice comes into the picture. It can build the object graph for you and all you have to is use those dependencies in your code and need not worry about how and where to get these dependencies.

Guice in Action

Guice controls Dependency Injection by Guice bindings.These bindings are used by guice to map object types to their actual implementations. All the bindings are defined in a module.

Let’s create a small application to better understand this. It is a simple application which tells user which vehicle being used for test drive.

Interface for vehicle

public interface Vehicle {
public void drive();
}
view raw Vehicle.java hosted with ❤ by GitHub

Bike implementation of vehicle

public class Bike implements Vehicle {
public void drive() {
System.out.println("I am in Bike implementation of vehicle");
}
}
view raw Bike.java hosted with ❤ by GitHub

Car implementation of vehicle.

public class Car implements Vehicle {
public void drive() {
System.out.println("I am in Car implementation of vehicle");
}
}
view raw Car.java hosted with ❤ by GitHub

Module containing guice bindings.

import com.google.inject.AbstractModule;
public class VehicleShoppingModule extends AbstractModule {
@Override
protected void configure() {
bind(Vehicle.class).to(Bike.class);
}
}

Notice Vehicle class is bound to Bike implementation in module.

Now lets create class VehicleShopping with vehicle as dependency.

import com.google.inject.Inject;
public class VehicleShopping {
private Vehicle vehicle;
@Inject
public VehicleShopping(Vehicle vehicle) {
this.vehicle = vehicle;
}
public void testDrive() {
vehicle.drive();
}
}

We need to create a guice injector for this dependency injection to work. An injector builds the graphs of objects that make up your application and tracks the dependencies for each type and uses bindings to inject them. Thus, the first step is to create an injector and then use the injector to get the objects.This method is to be called once during application startup.

import com.google.inject.Guice;
import com.google.inject.Injector;
public class Main {
public static void main(String[] args) {
Injector injector = Guice.createInjector(new VehicleShoppingModule());
VehicleShopping vehicleShopping = injector.getInstance(VehicleShopping.class);
vehicleShopping.testDrive();
}
}
view raw Main.java hosted with ❤ by GitHub

Response after running application.

I am in Bike implementation of vehicle

Here VehicleShopping class does not care which implementation is provided and all responsibility to get desired objects and their dependency resolved is handled by Guice.

Reference:

Google Guice

Dependency Injection – NPE

Clone the project from github

Github Link of the project